After a 6 month idle period, I am retaking my project to build a DARwIn-OP robot clone.
The first order of business was to fix an issue with a WordPress multi-language plugin that was screwing up the blog in English and Spanish for some time now.

Just another WordPress site
After a 6 month idle period, I am retaking my project to build a DARwIn-OP robot clone.
The first order of business was to fix an issue with a WordPress multi-language plugin that was screwing up the blog in English and Spanish for some time now.
After doing some tests, I finished with all Idlers anodized. I am still waiting for some black dye to arrive, but the Idlers and Caps don’t use dye.
The process used was:
Since I did my first test cuts with some aluminum 2011, I used this test Idlers to try the anodizing process first. The surface finish will depend on the aluminum alloy used. With the 6061 alloy I got a nicer finish.
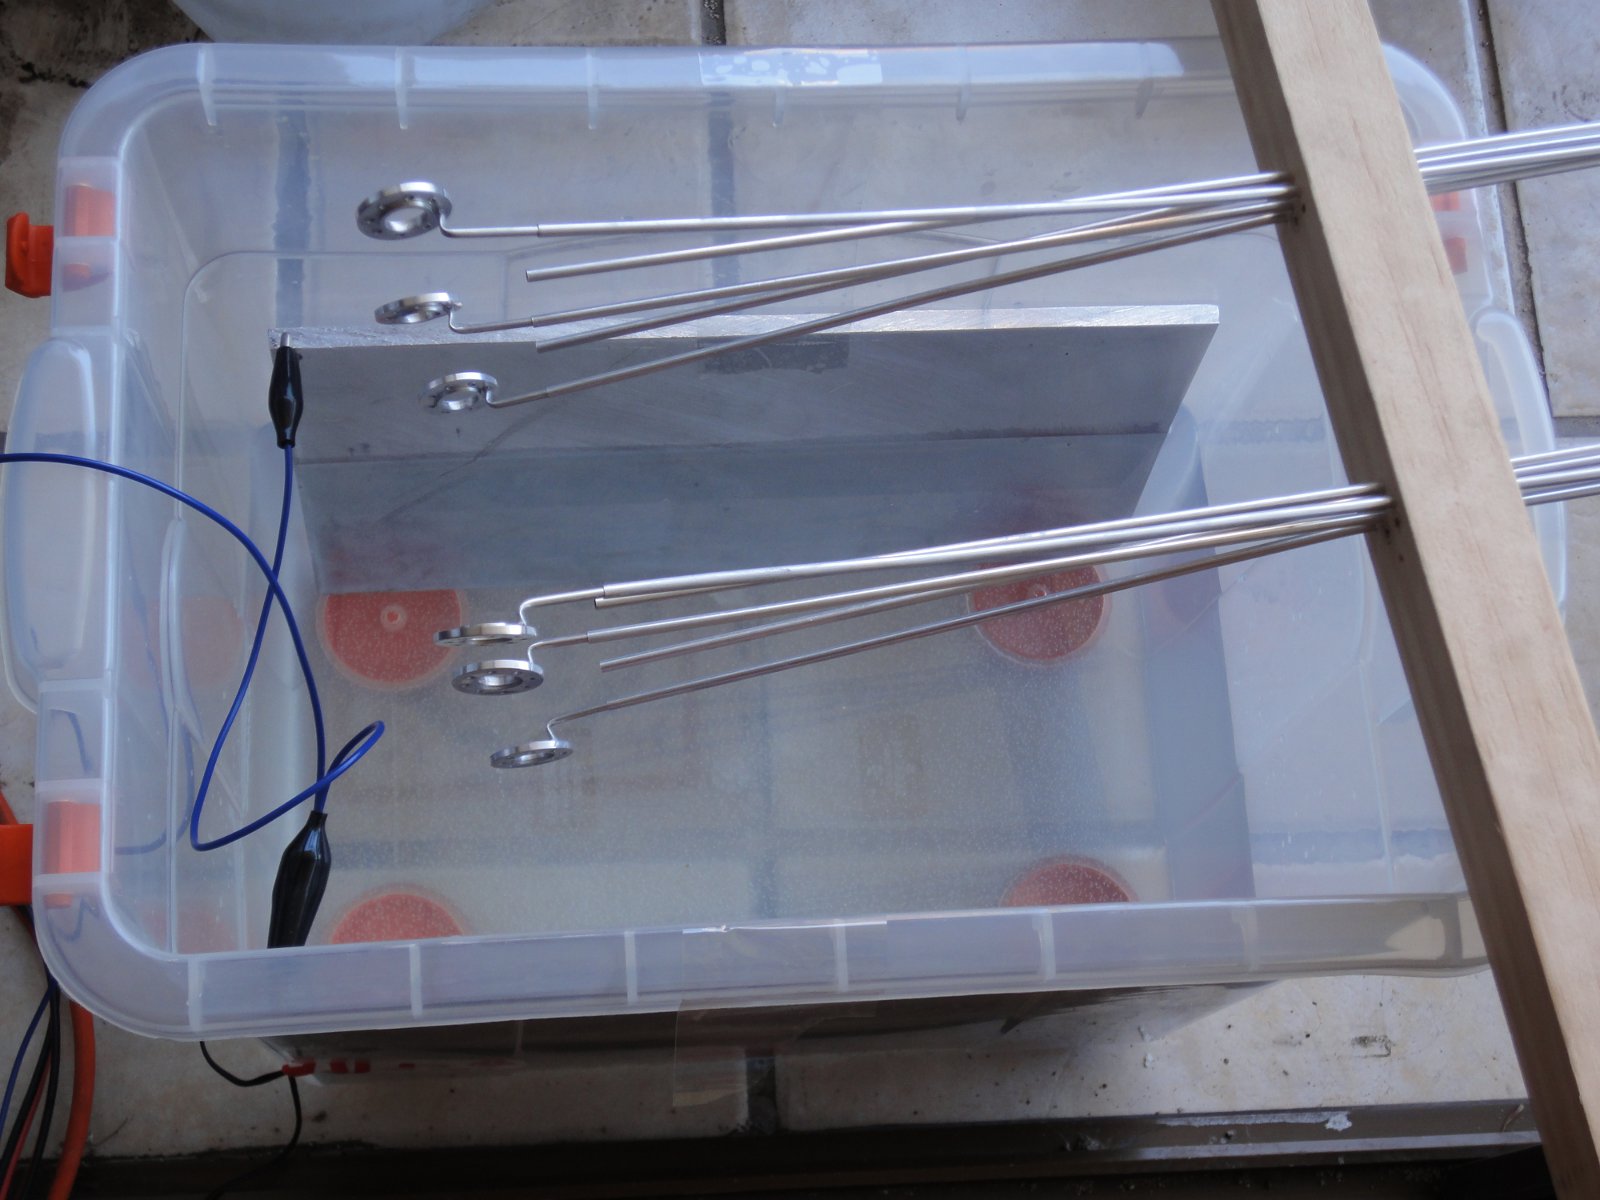
I did get some parts ruined with some anodizing marks, specially in a few Idler Caps. At least I have a few spares and they are easy to make. I saw in a tutorial video in YouTube that the parts are never clean enough to anodize them. Anyway, I need to do more research and tests before anodizing and dyeing the frames.
I will also test using a longer sodium hydroxide bath. The aluminum oxide buildup by anodizing is noticeable since the ball bearing fits tighter in the Idler, there is space for a longer bath (since it eats up some material).
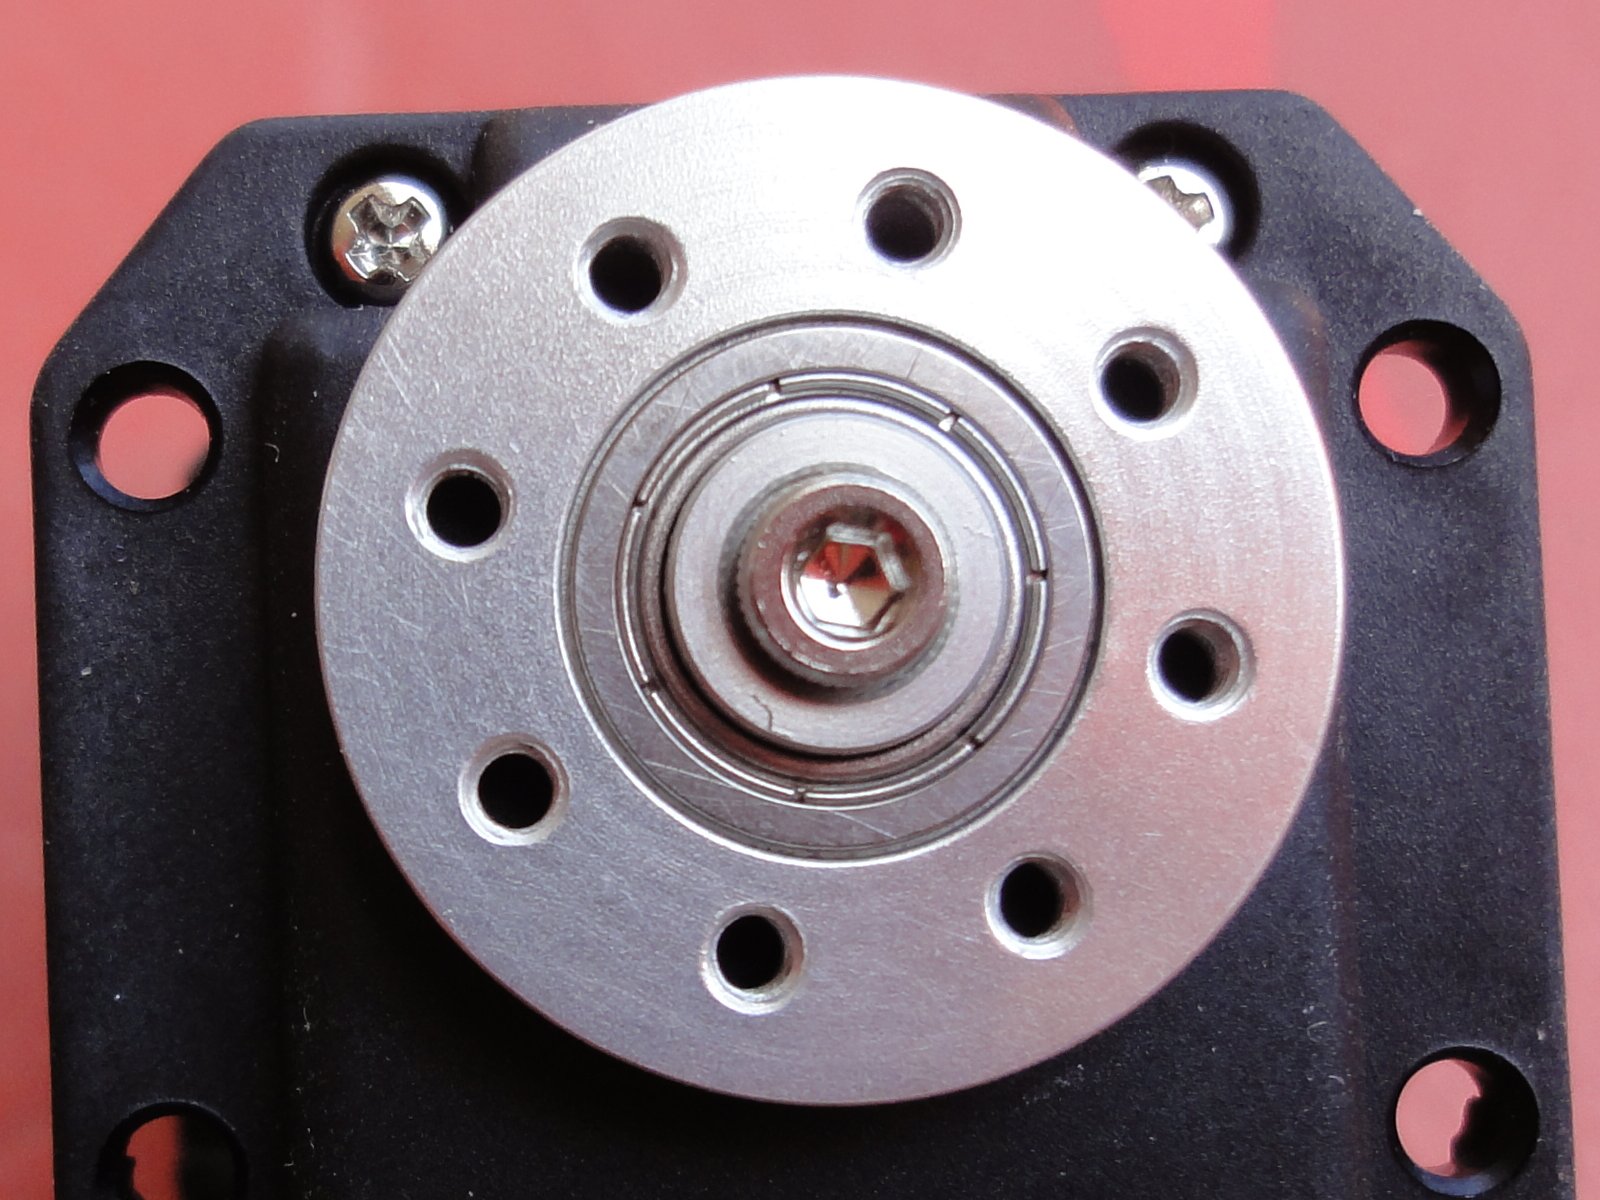
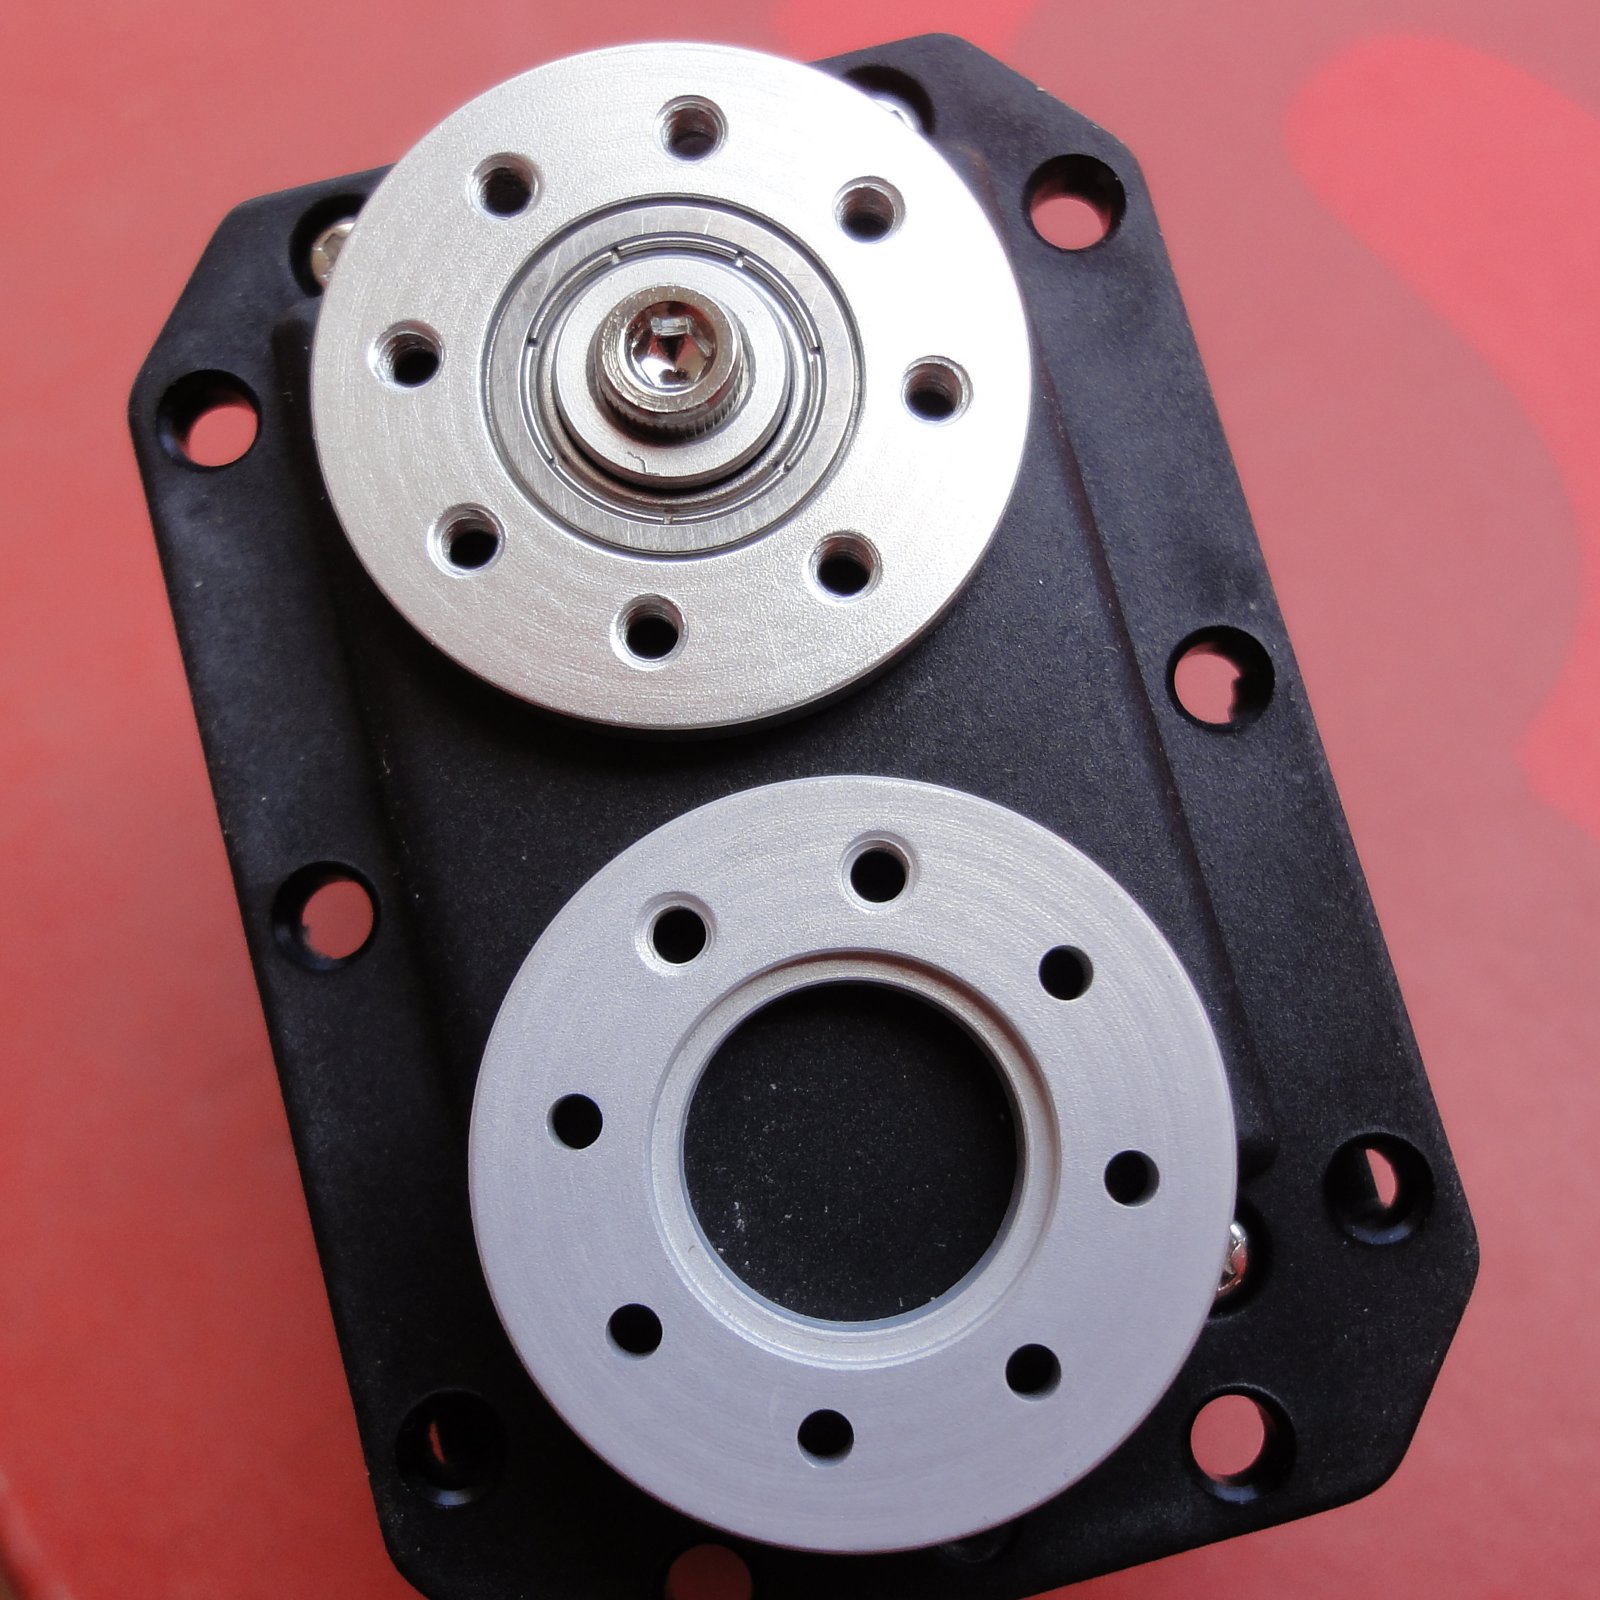
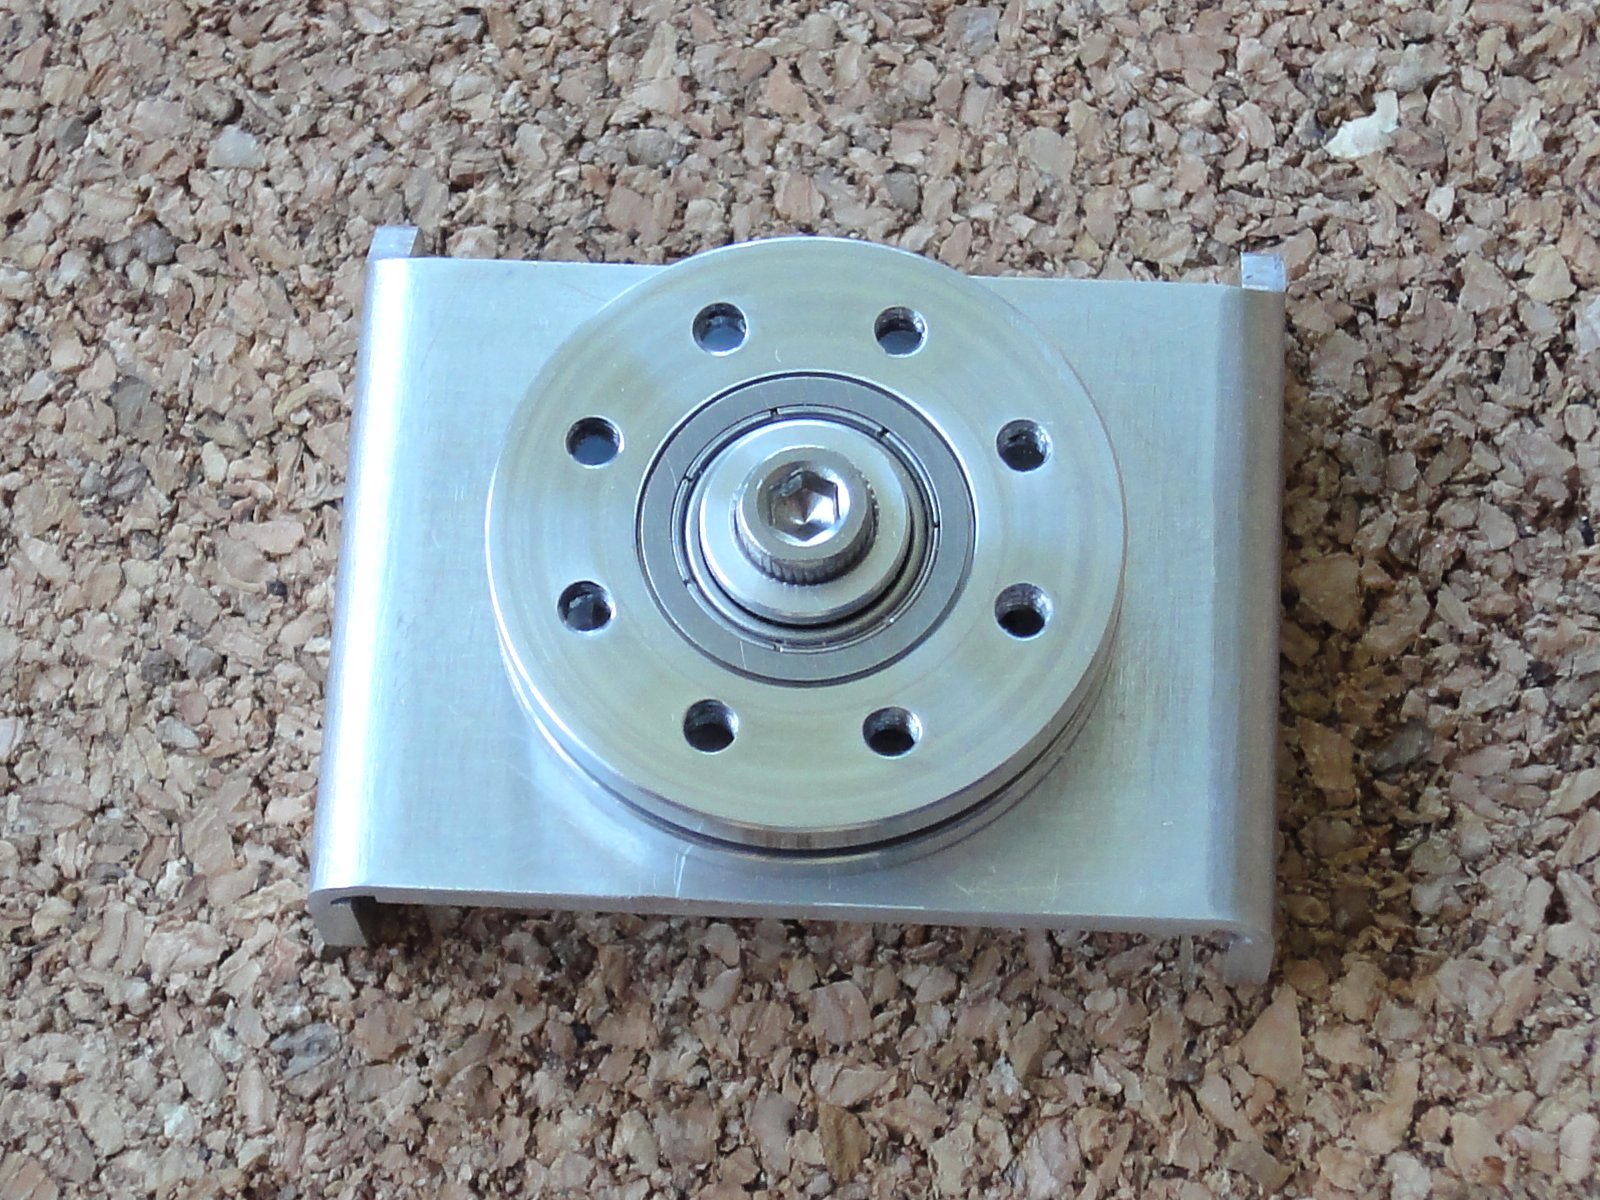
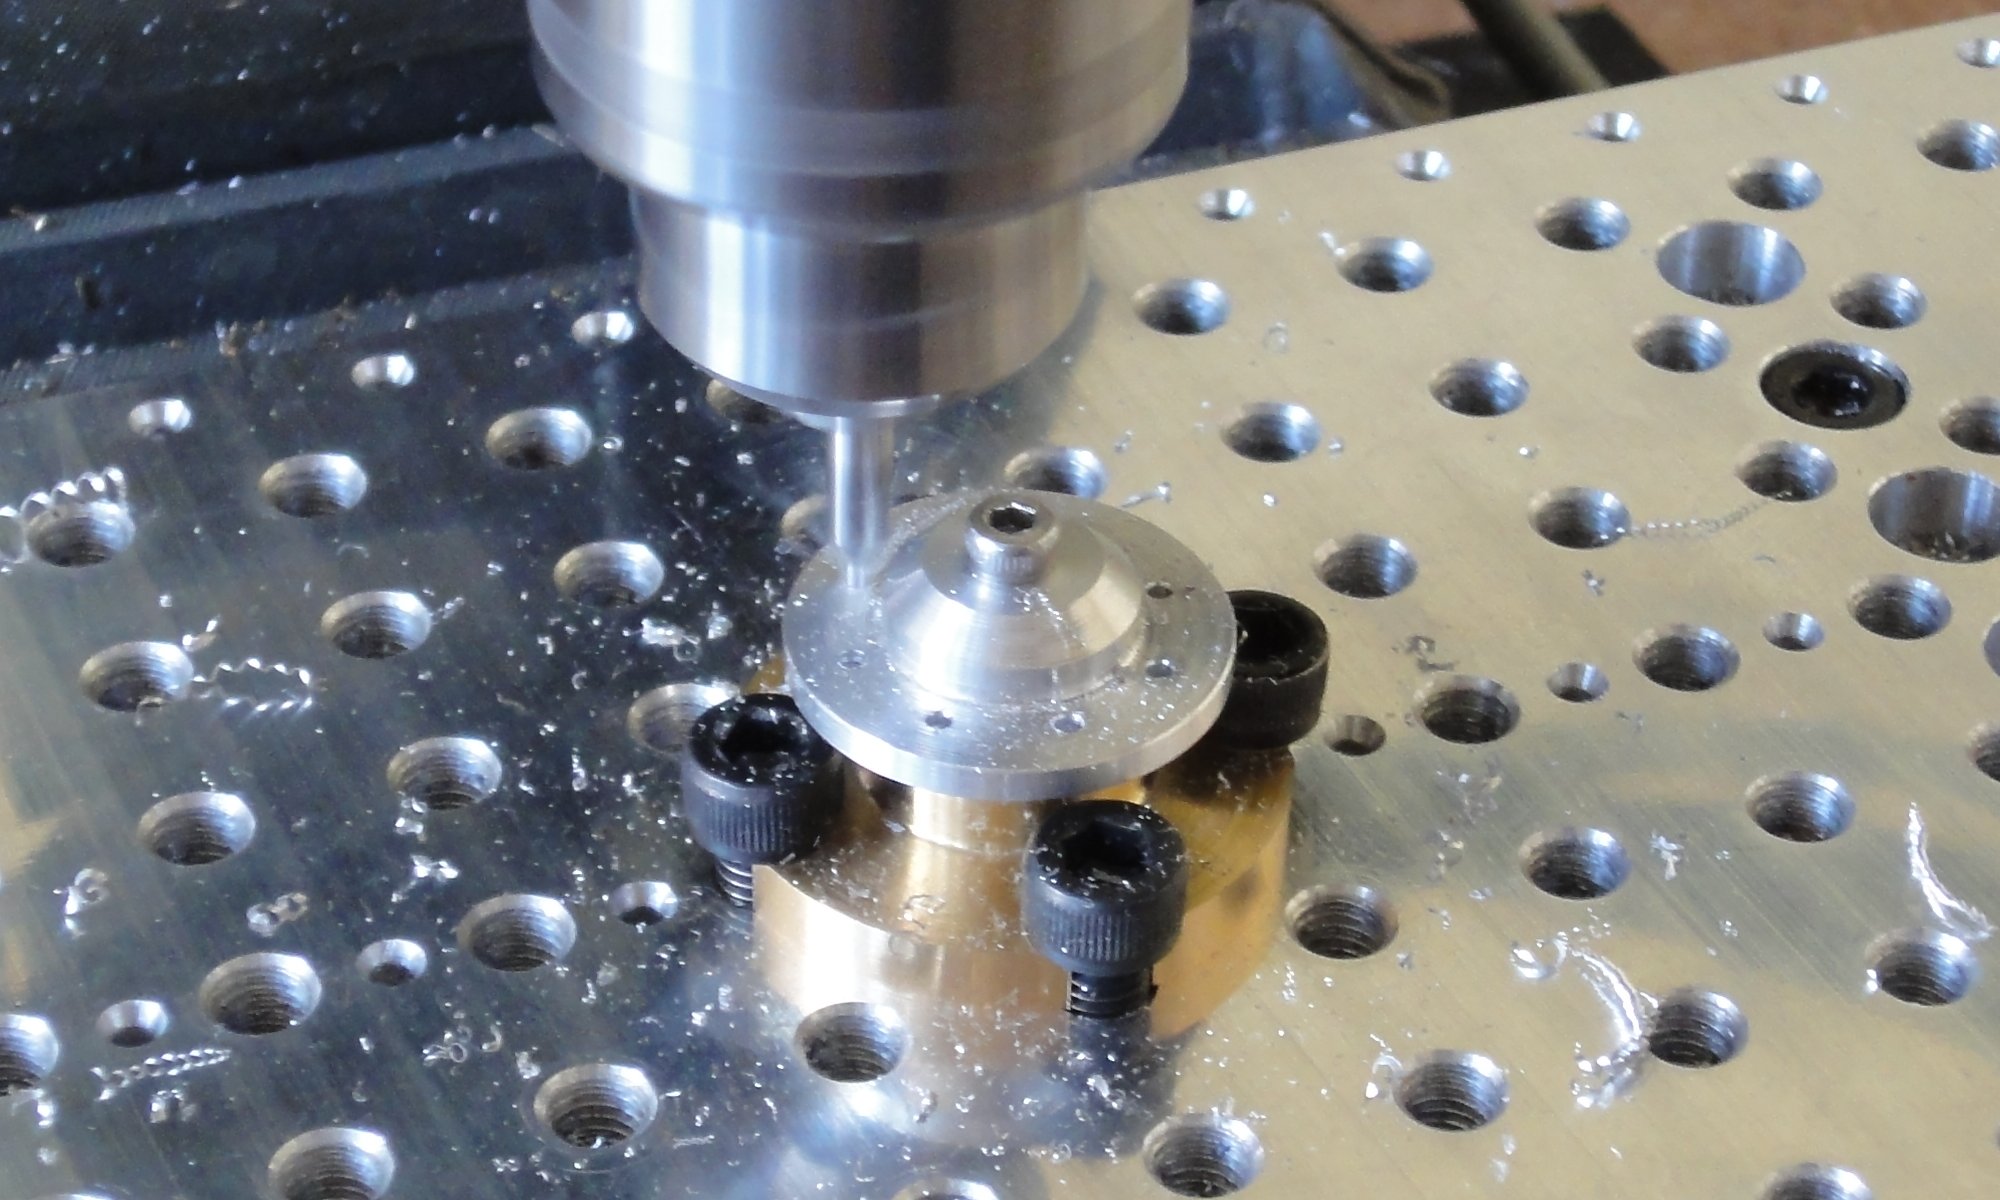
Now that I finished the Flange Bearings and Bearing Idlers, I am doing a test of the full assembly of the first leg of my DARwIn-OP clone.
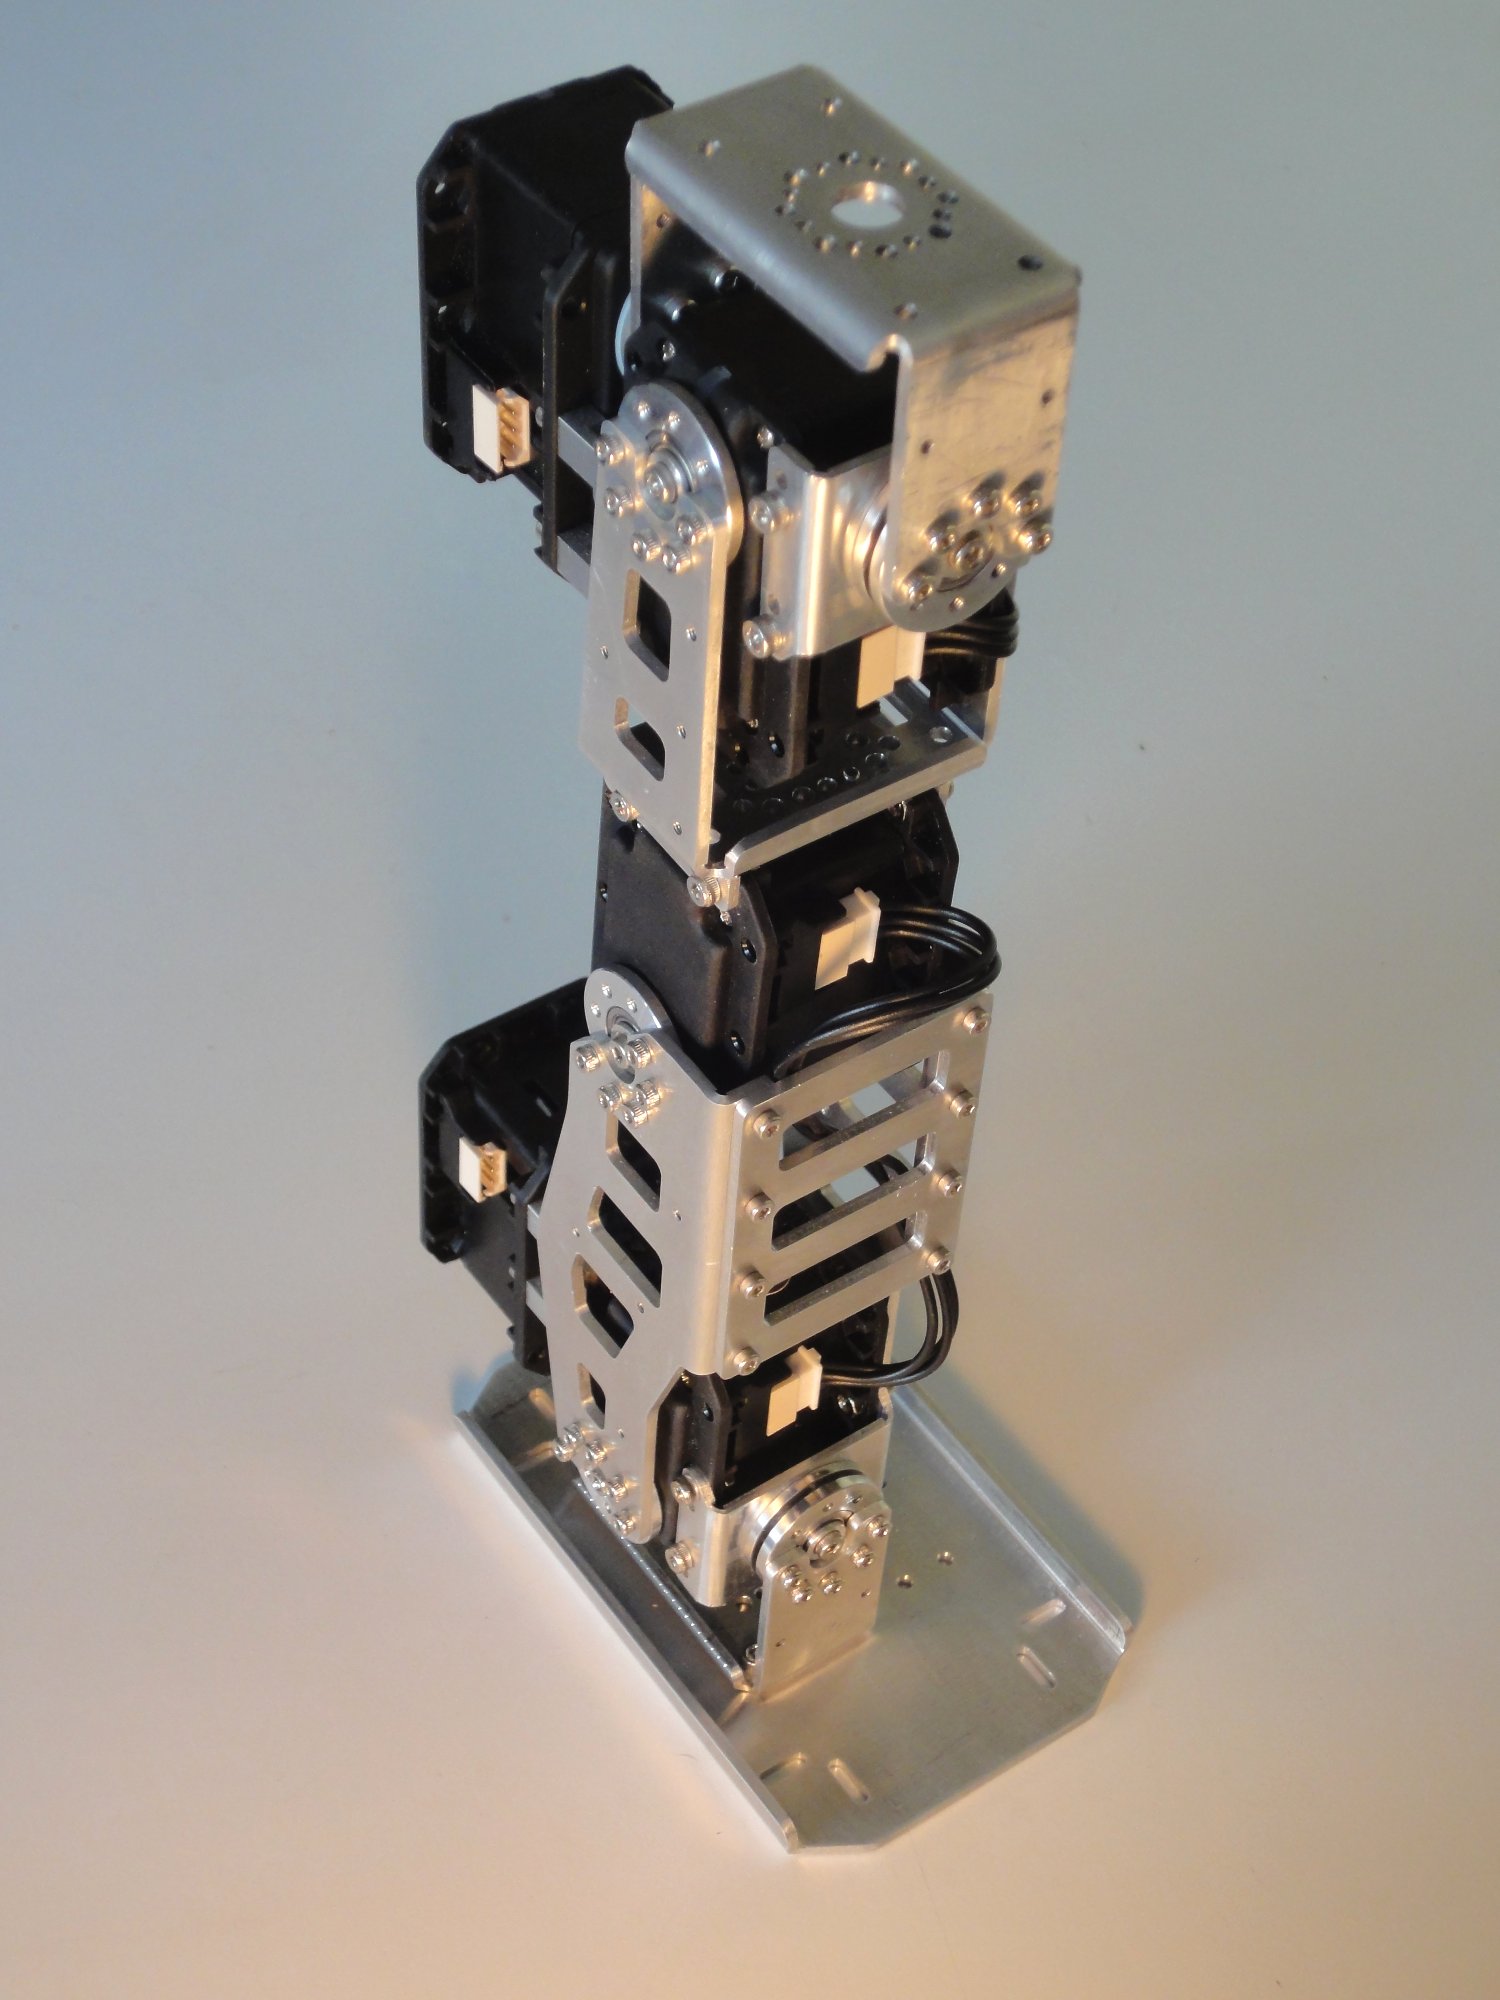
After adjusting the bends of the FR07_H120 frames the idlers align perfectly.
Now I’ll continue making the rest of the HR07_I101 Bearing Idlers (still 9 to go) before starting to bend the frames for the second leg and start cutting the frames from the waist up. Anyway I am still waiting for some black dye to arrive before anodizing the frames.
I just finished uploading the remaining gcode files for cutting all the leg frames for a DARwIn-OP robot clone.
They are available in the Code Section and zipped together in File Section at the sourceforge repository for cloning the DARwIn-OP Robot.
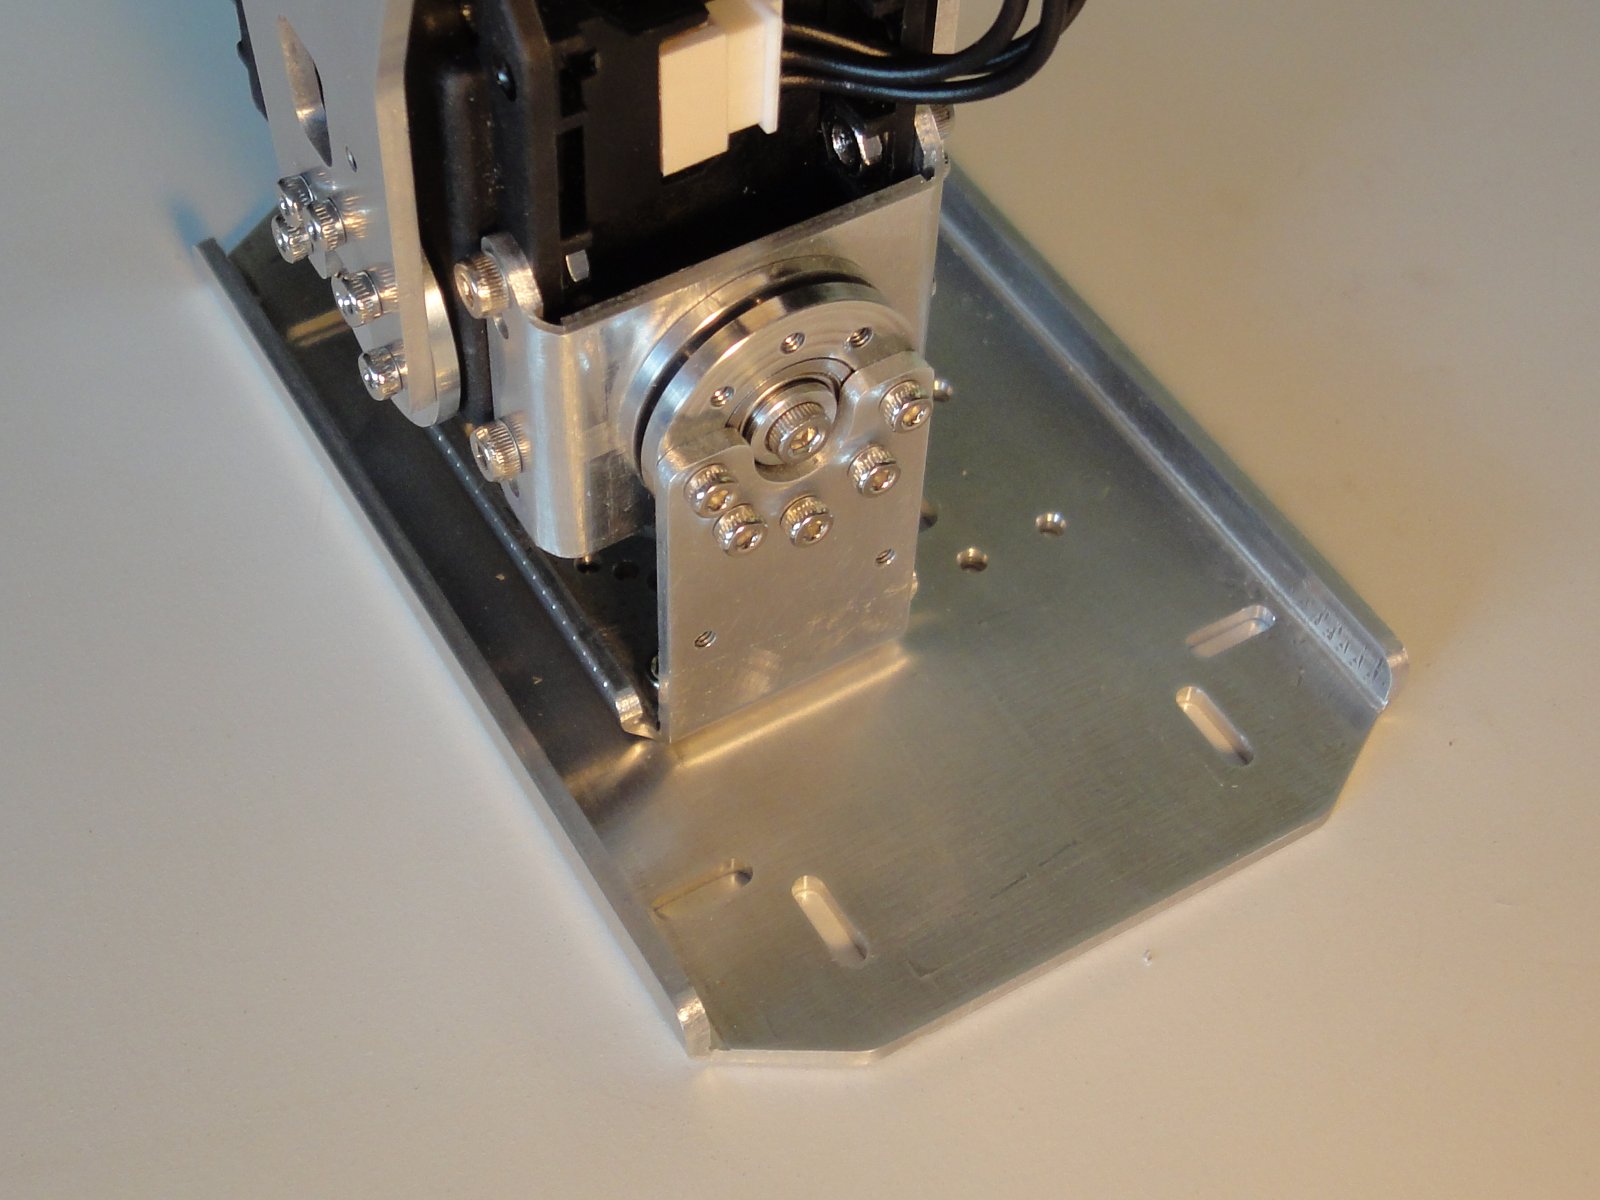
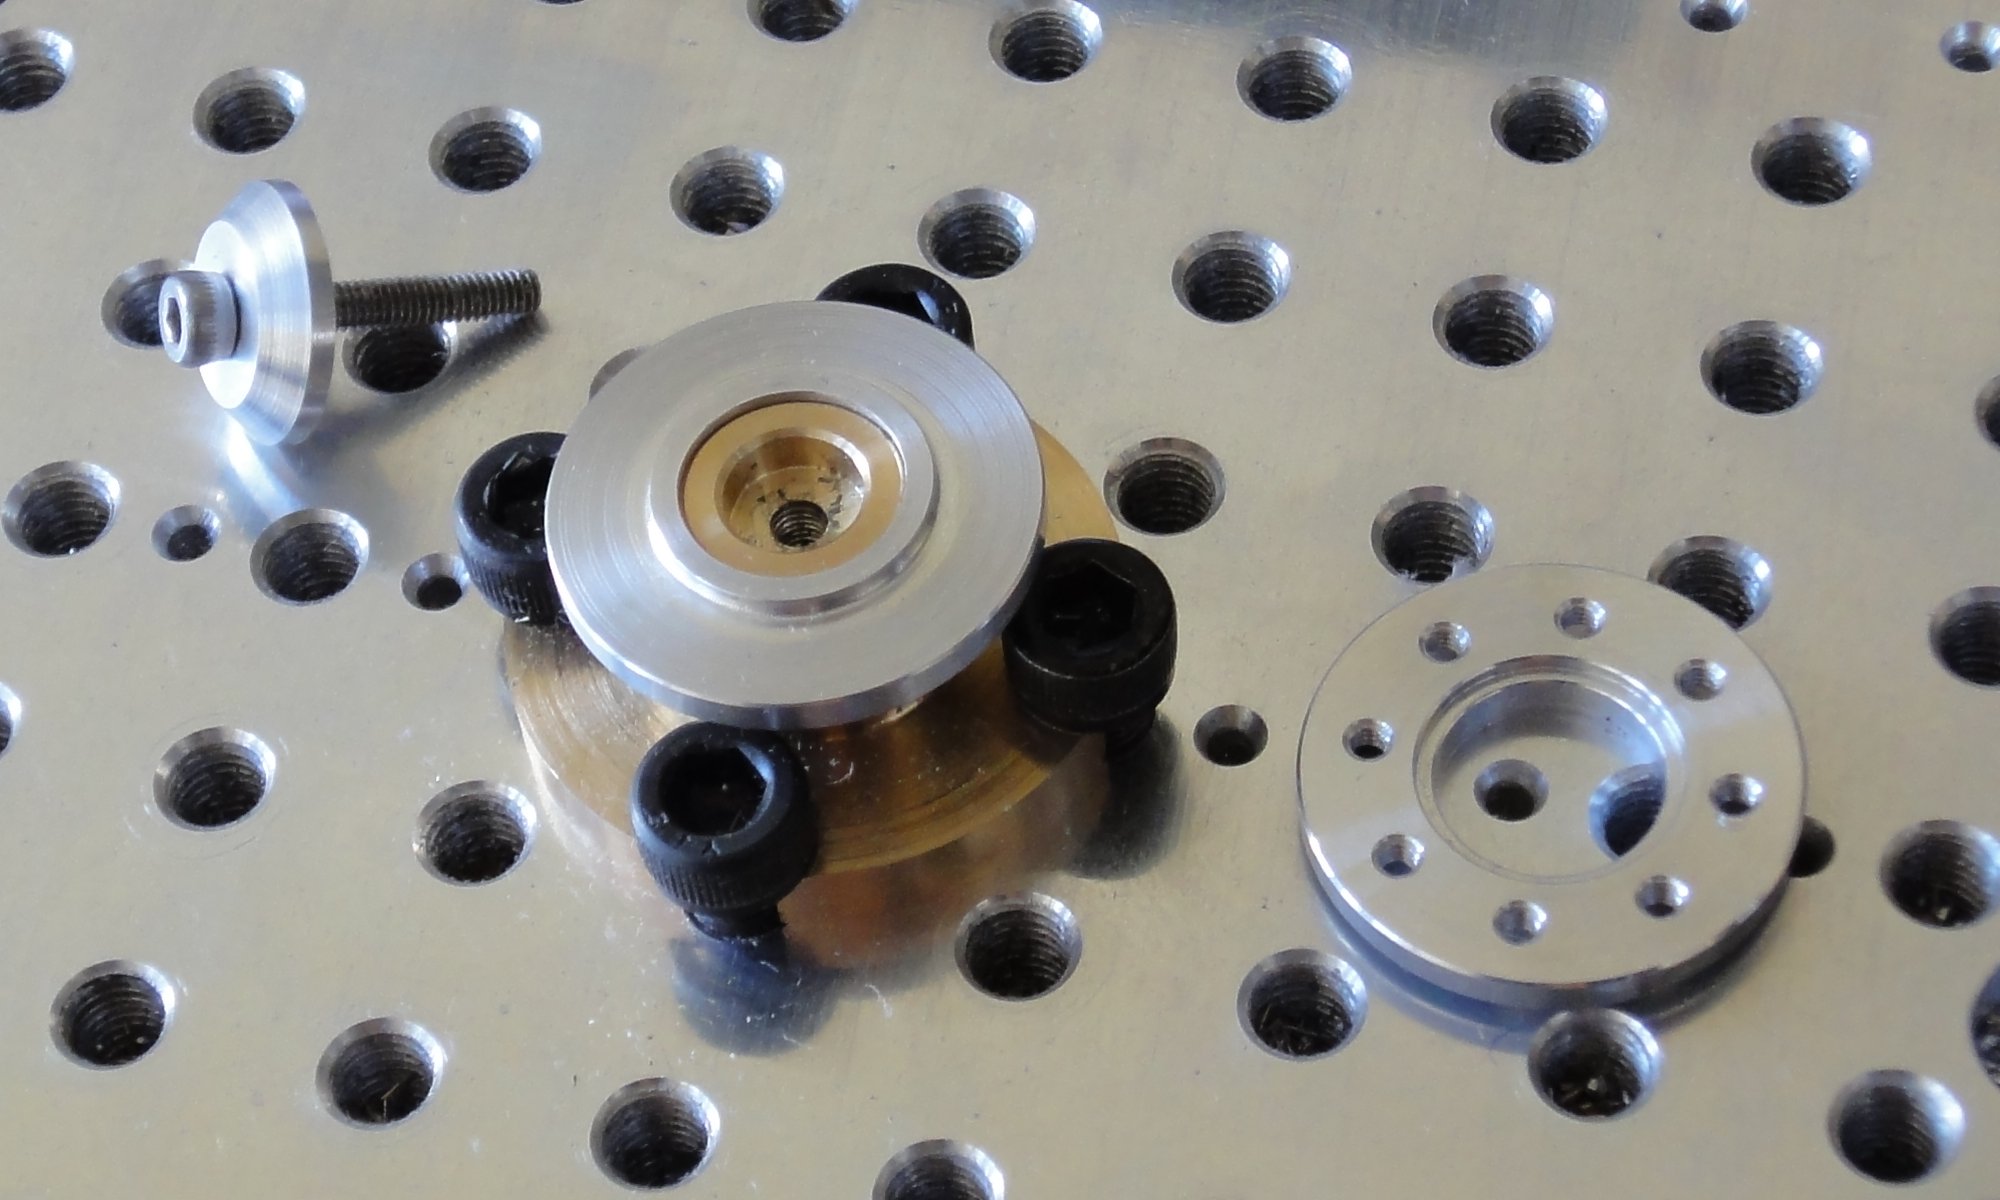
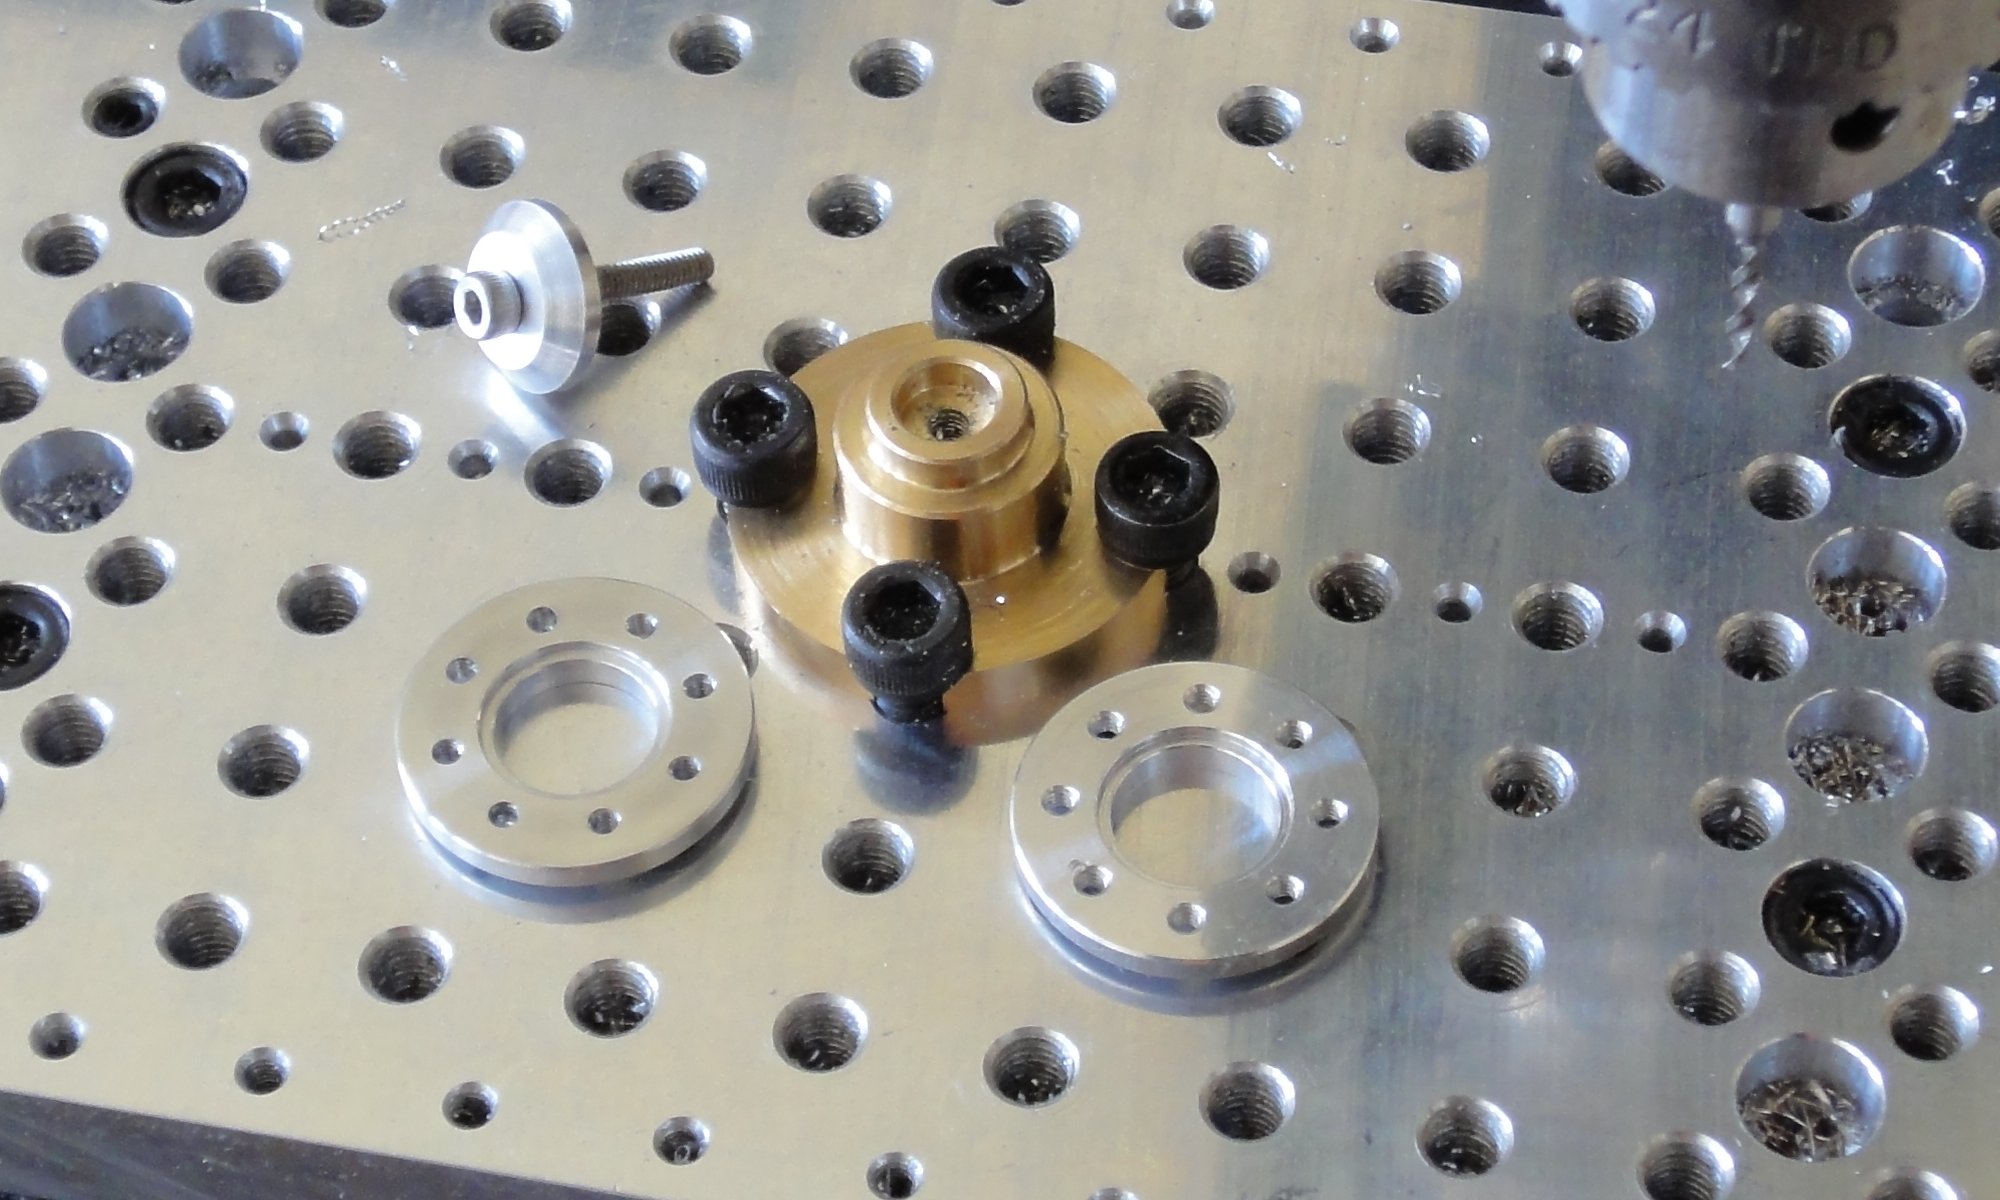
I almost decided to buy the 4 Flange Bearings FR07_F101 needed for a DARwIn-OP clone. But it just took me one afternoon to cut them on the lathe and drill them on a mill.
I tested the assembly of a bearing joint as described in the DARwIn-OP Assembly Manual. I haven’t anodize the parts and it seems I’ll have a hard time disassembling the joint, the bearing is very tight.
The gcode cut programs are in the Code Section and zipped in File Section in sourceforge repository for cloning the DARwIn-OP Robot.
Now I can continue testing the full assembly of a leg of my DARwIn-OP clone.
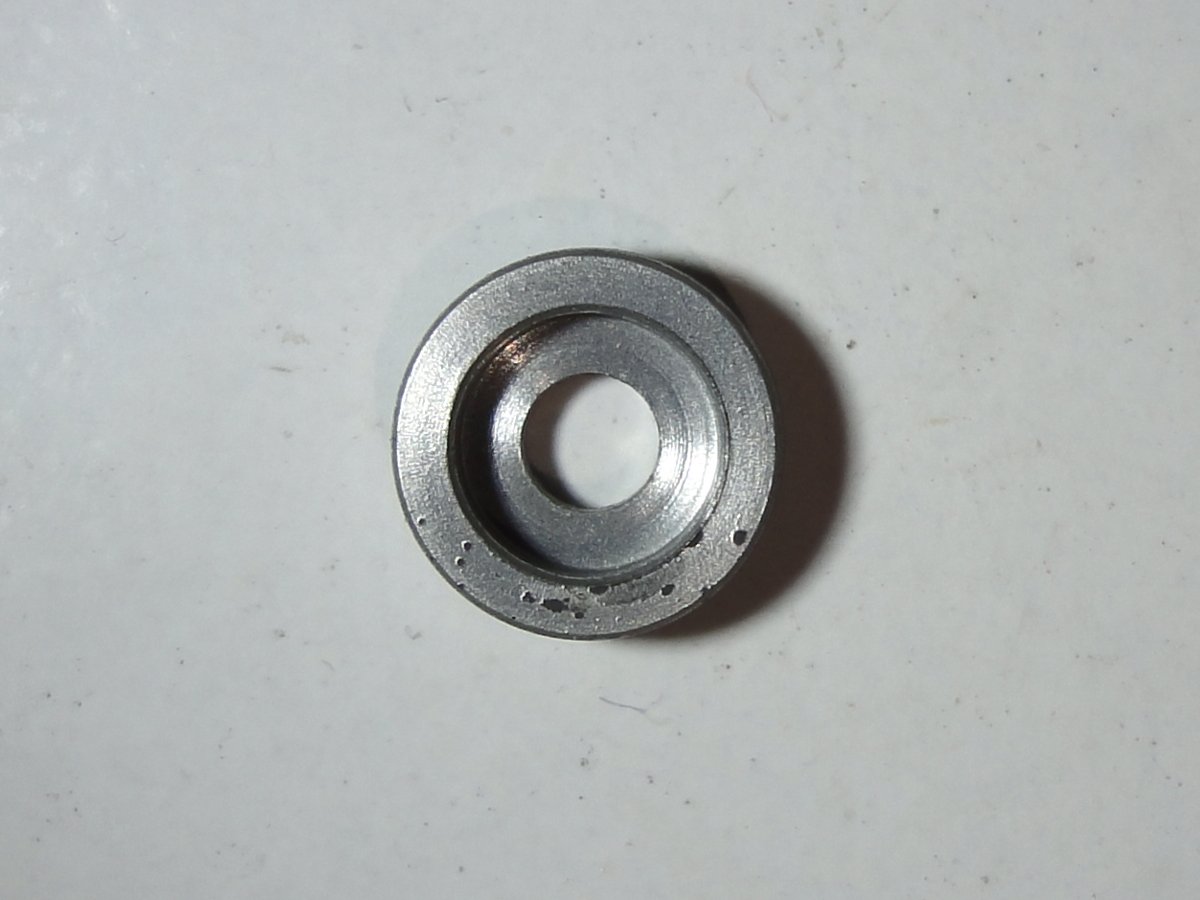
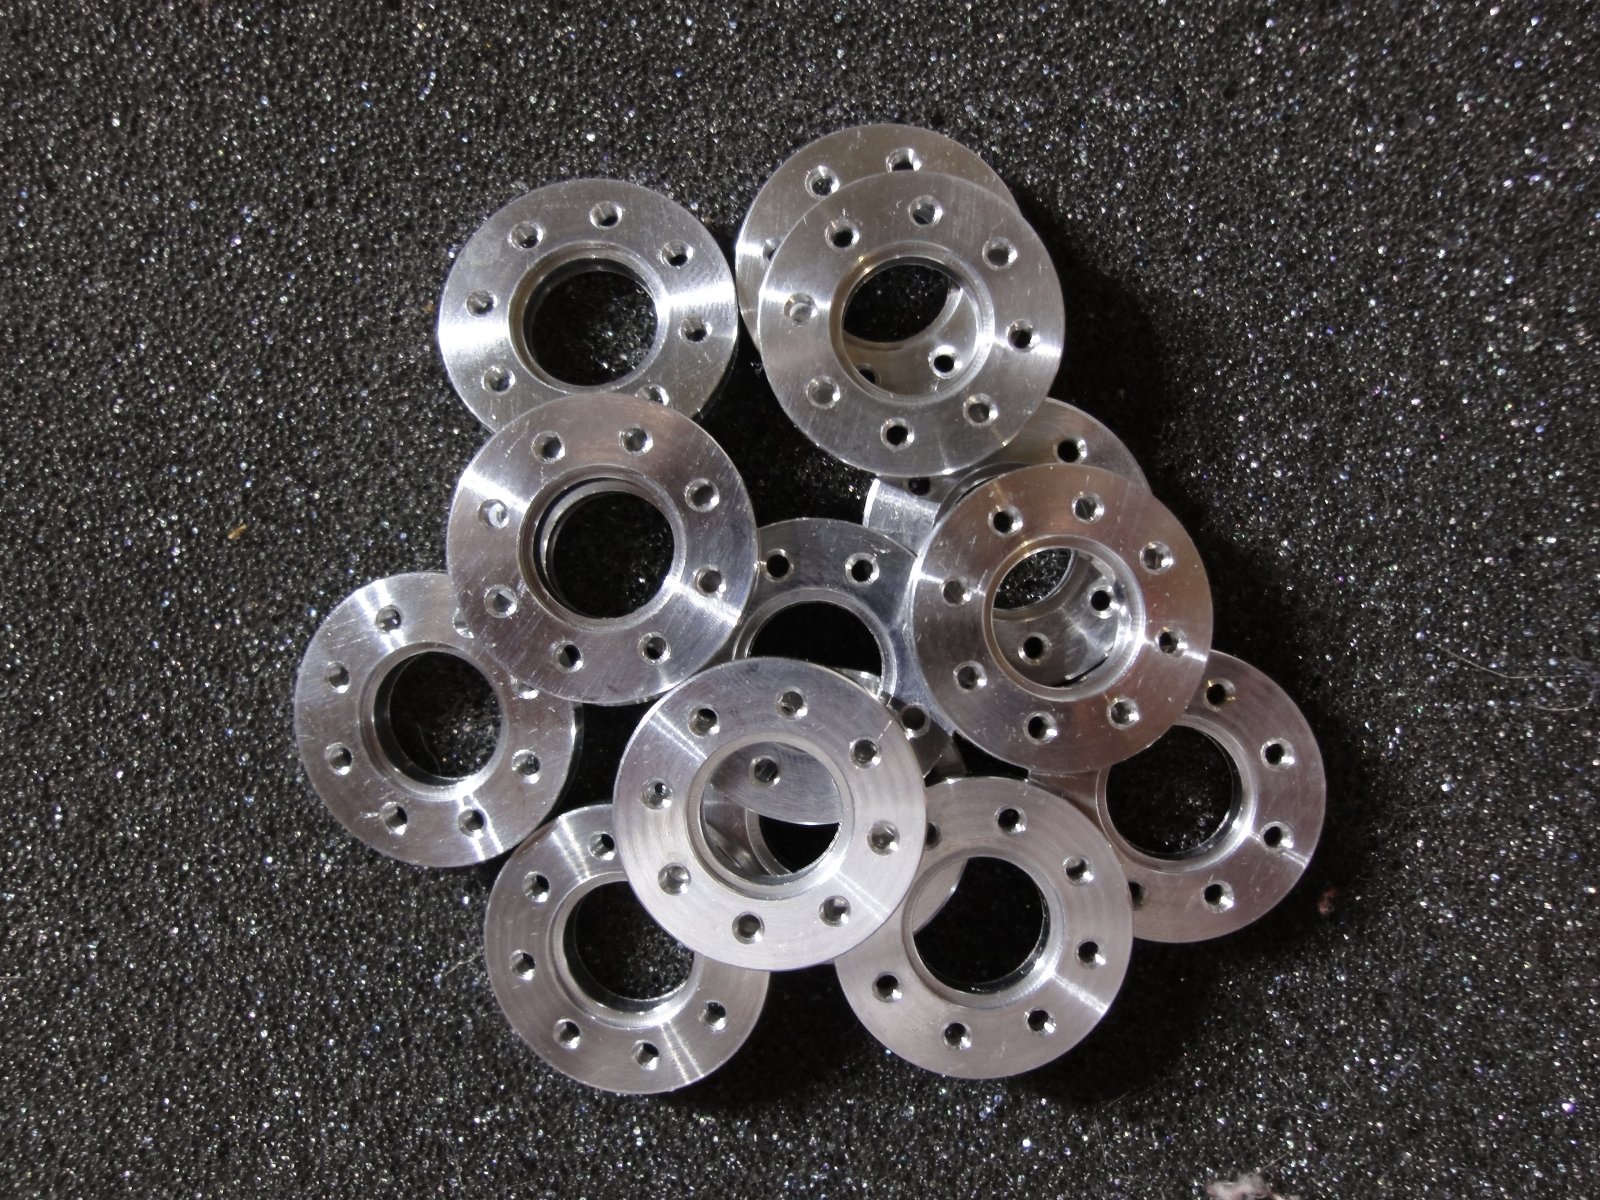
So now that I managed to make a bearing idler for my DARwIn-OP robot clone, I have to produce enough for a whole robot.
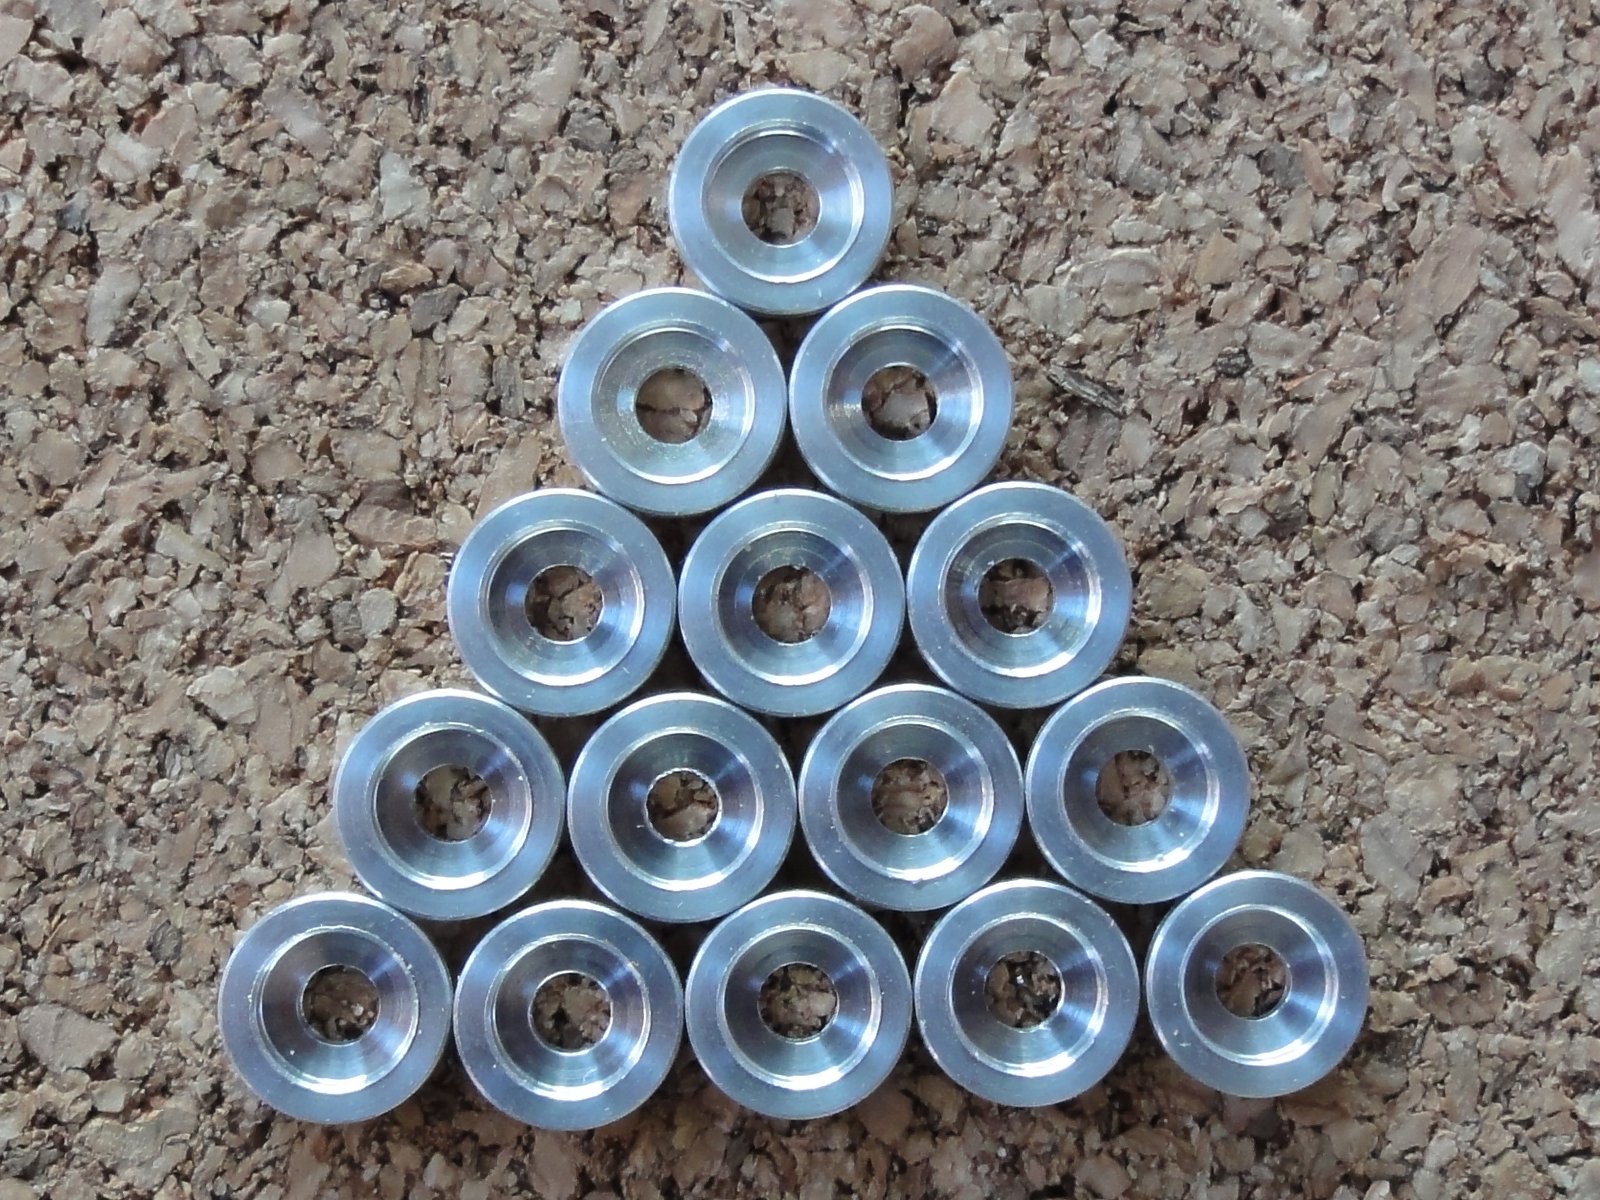
I am starting with the Bearing Cap which is the easiest part to machine on a lathe.
15 Caps is enough for a basic DARwIn-OP robot.
Updated: The gcode cut programs are in the Code Section and zipped in File Section in sourceforge repository for cloning the DARwIn-OP Robot.
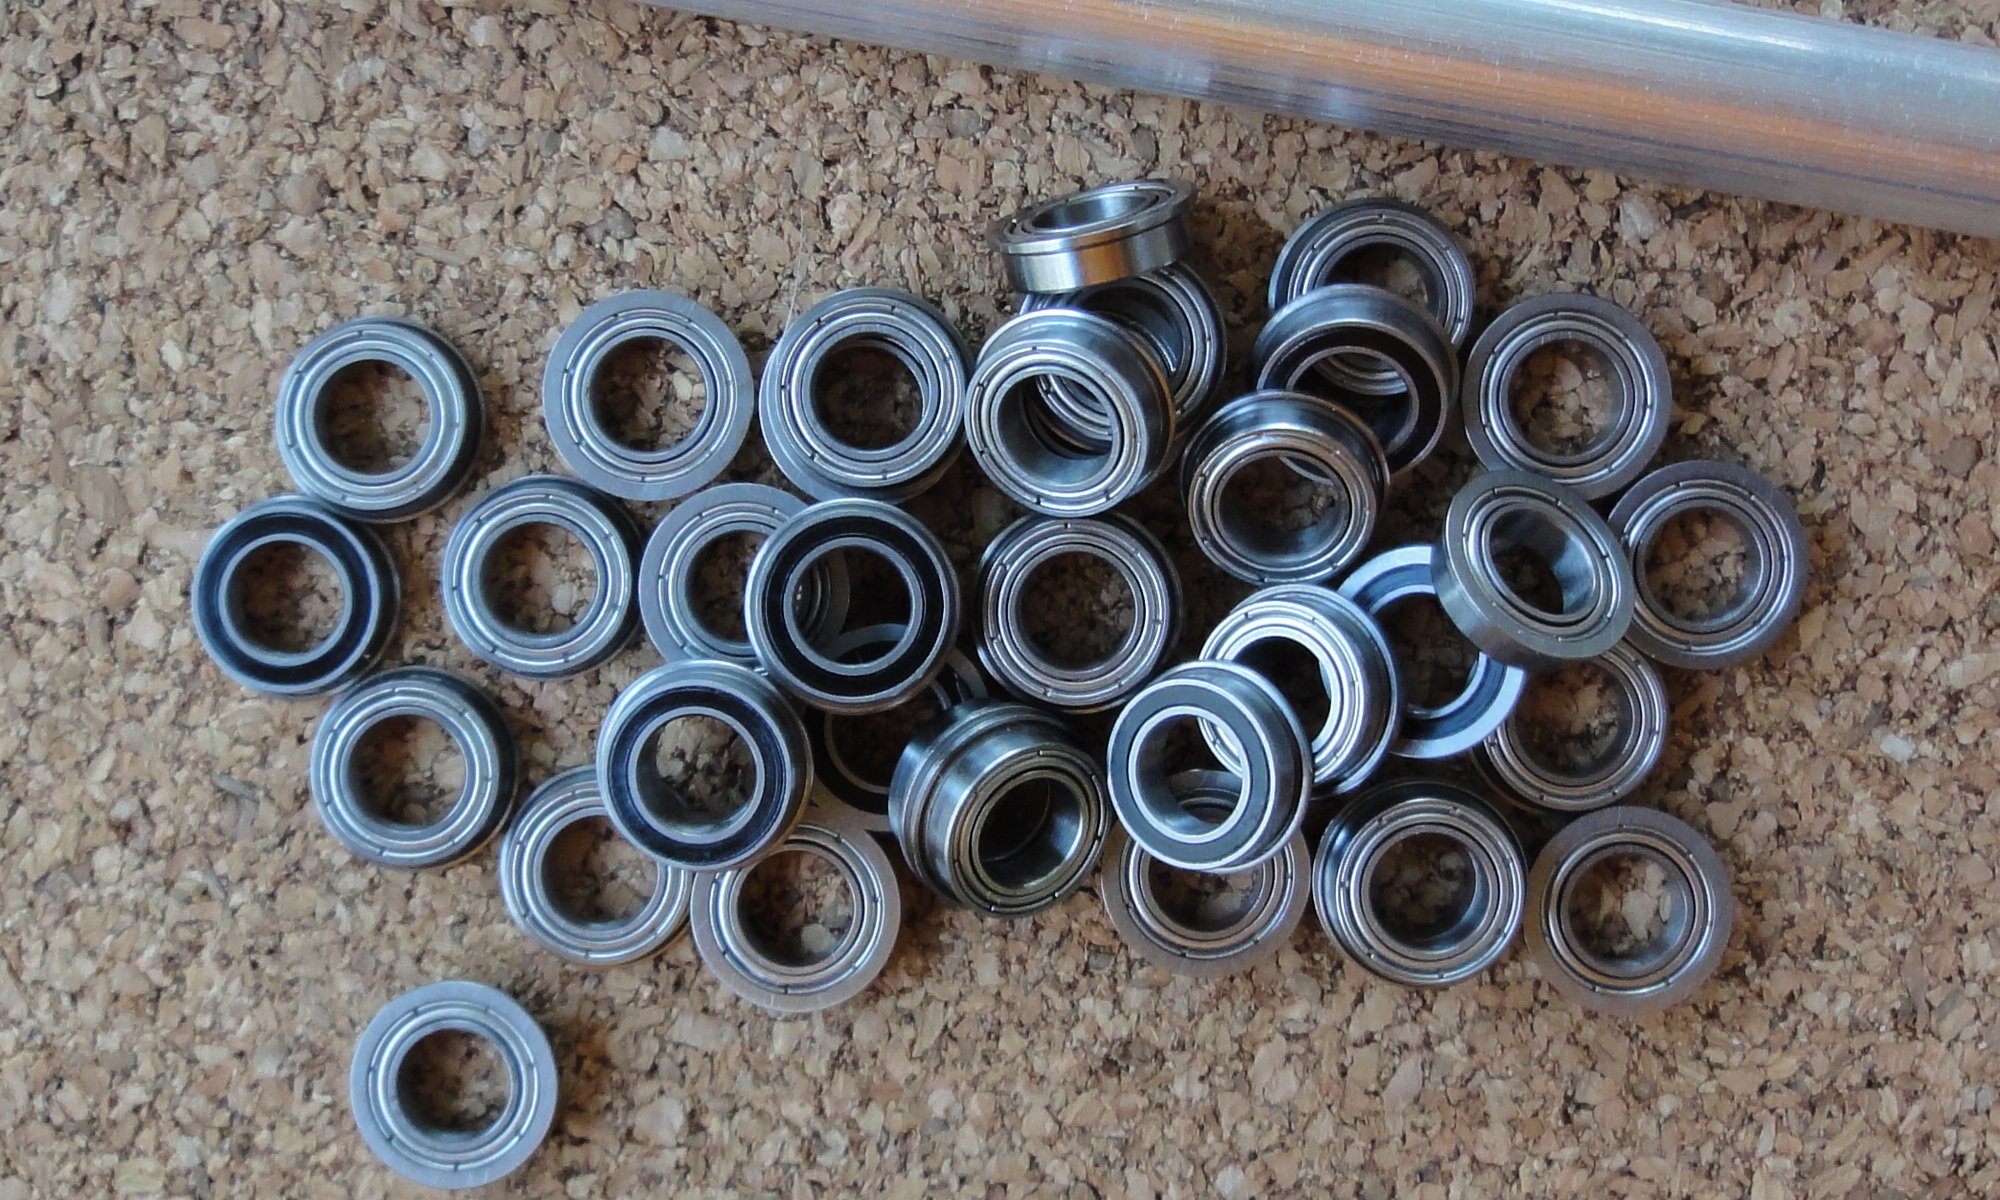
Just got the MF106ZZ ball bearings and some 6061 aluminum bars for my DARwIn-OP robot clone.
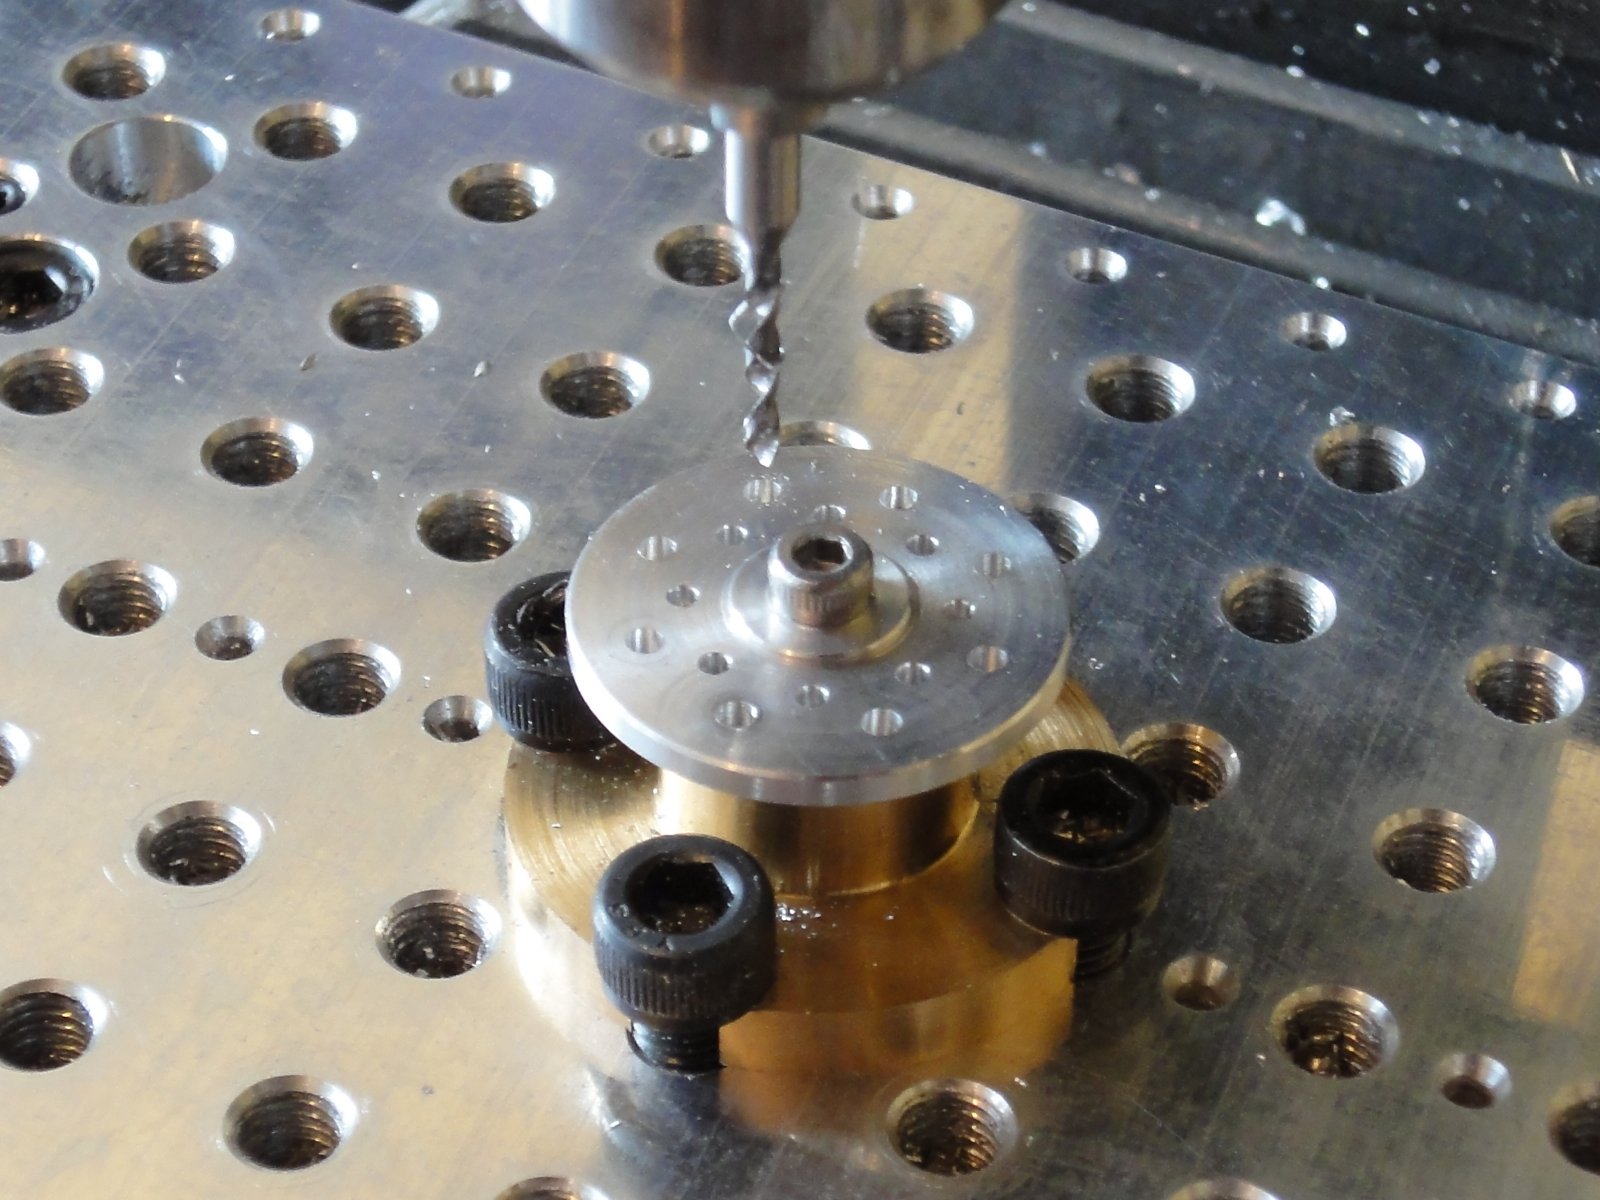
I cut a bunch of HN07-I101, and RX28-CAP on my lathe as in my test cuts. I devised a tool to hold the HN07-I101 and FR07-F101 while drilling the missing eight 1.6mm hole pattern.
The hole pattern is drilled on a Sherline Mill using a #1 center drill and a 1.6mm drill.
Finally the HR07-I101 Bearing Idler has to be tapped to M2.
Updated: The gcode cut programs are in the Code Section and zipped in File Section in sourceforge repository for cloning the DARwIn-OP Robot. The tool is machined on a lathe and finished on a mill for the 4 clamping screws.
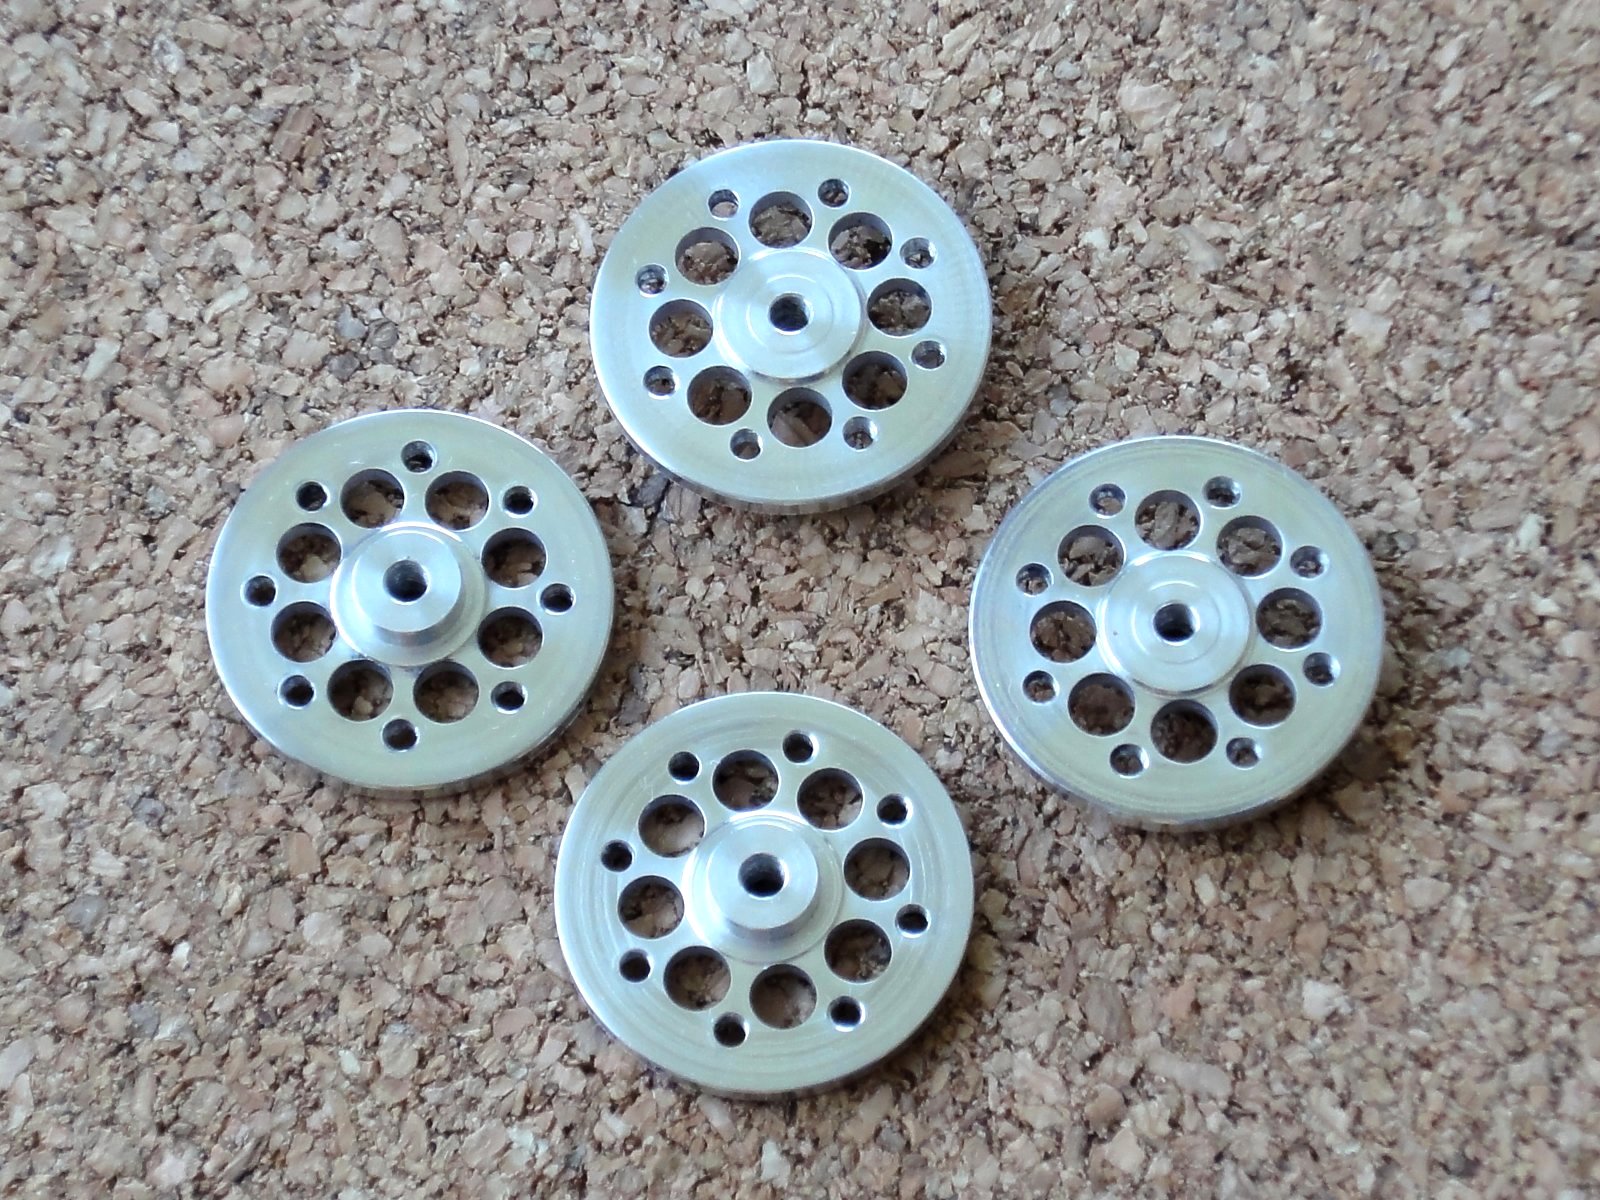
At last I finished cutting all HR07-I101 parts, with a few spares. So I am finished with the lathe cuts. The DARwIn-OP robot clone requires 15 HR07-I101s, 15 RX28-CAPs, and 4 FR07-F101. I thought about buying all these parts but making them wasn’t so bad, specially with the lathe’s quick-change tools it is easy to make identical parts. Tapping all the 2mm threads was a bit tedious.
Now I will polish and try to anodize the HR07-I101s and RX28-CAPs with natural aluminum finish (all other parts should be black anodized, still waiting for the black dye) before mounting.
Now that I am finished setting up my Sherline CNC lathe to cut my missing DARwIn-OP parts (FR07-F101, HN07-i101, and RX28-CAP), I am doing the first test cuts.
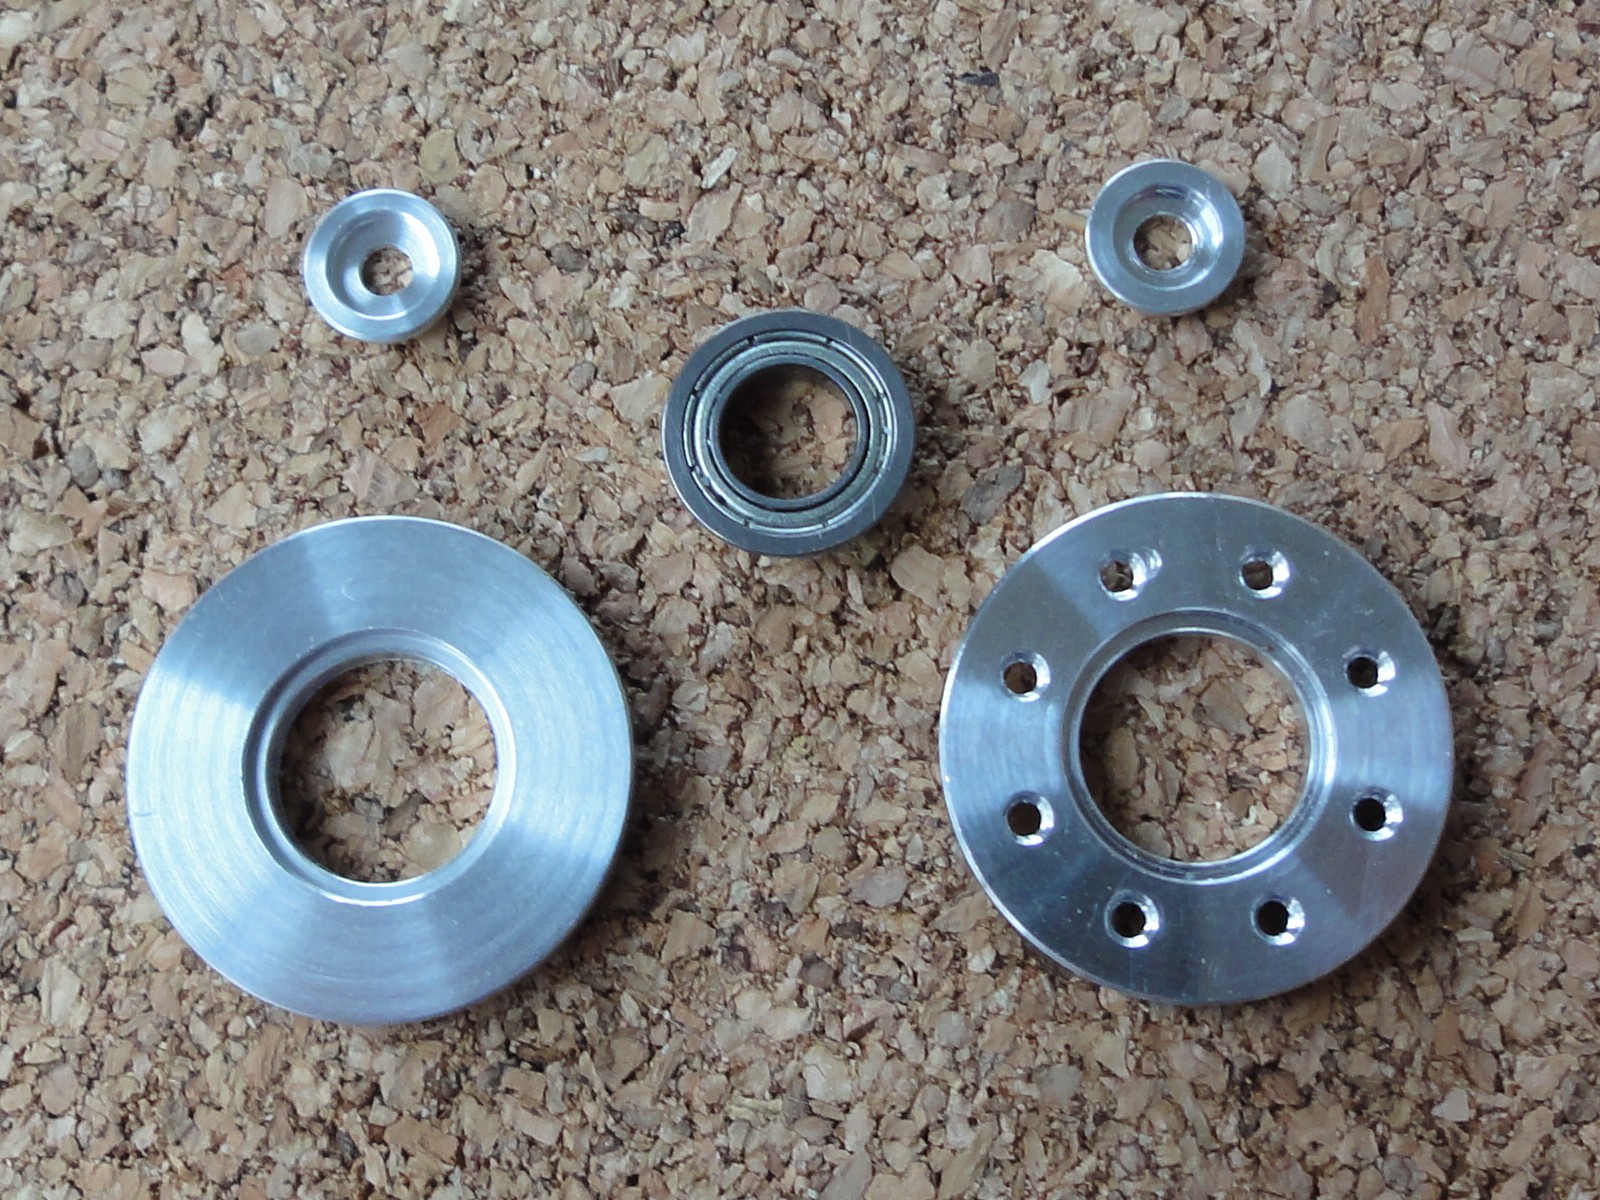
I manage to cut the HN07-I101 and RX28-CAP. I have an original set that I bought, so I am able to compare, the ball-bearing fits tight enough. I still have to make the holes, but I’ll device some tools to use on the mill for this. Then I still have to polish and anodize.
I used some spare 20XX aluminum that I had, a 1″ bar for the HN07-I101 and a 5/8″ bar for the CAP, I am still waiting for some 6061 aluminum 15/16″ and 3/8″ bars to do the final pieces. The G-code cut programs are available on the Code section of my sourceforge project, they require a quick (or automated) change tool post with this setup of tools.
Today I got my ODROID-XU (ARM Cortex-A15) board. While writing my DARwIn-OP Clone Leg Test post I noticed that HardKernel was doing a presale of the board. I ordered one and got it fast!
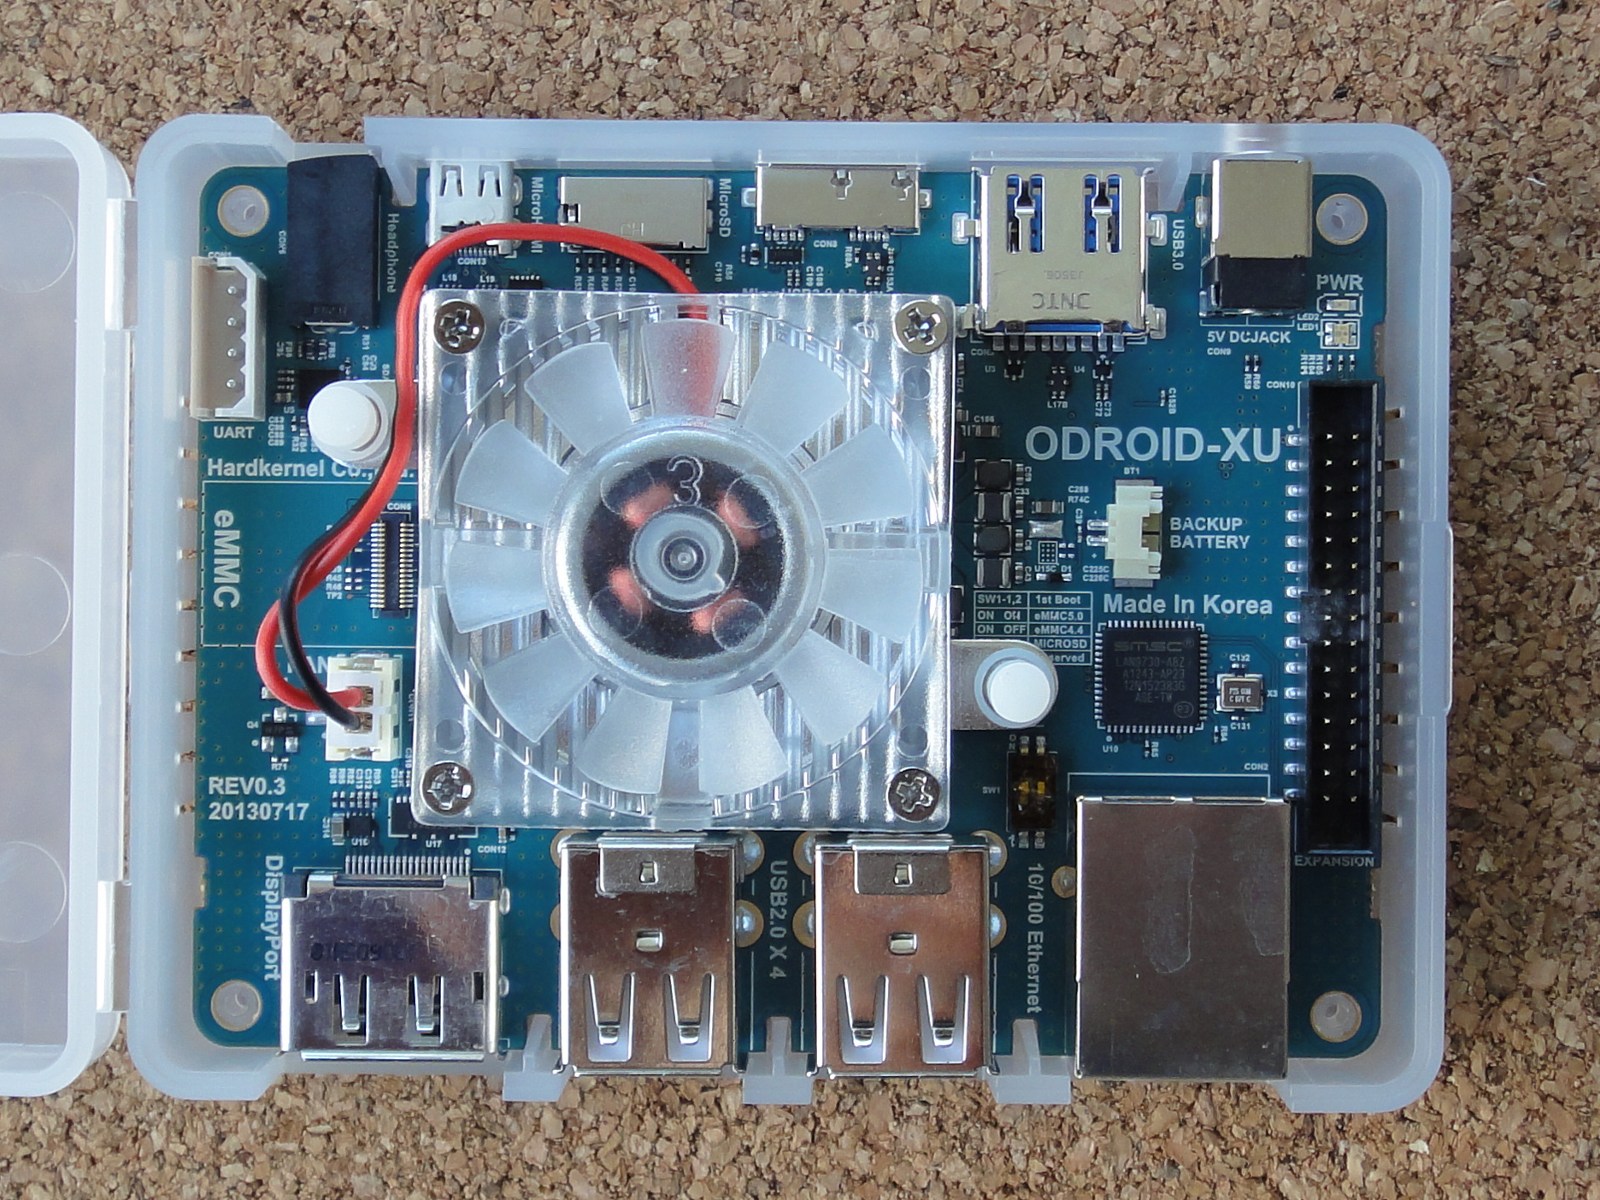
The specifications are:
– ARM big.LITTLE architecture.
– Exynos 5410 Octa, with Quad Cortex-A15 1.6GHz CPUs and Quad Cortex-A7 1.2GHz CPUs.
– 2GB RAM.
– USB 2.0 and 100Mbps Ethernet.
– Runs Android or Ubuntu.
– Can use an SD or a eMMC module (8 to 64GB) as hard drive.
– 2 USB 3.0 and 4 USB 2.0 ports.
– 94x70mm board.
The board is very small and low profile. It should be an excellent choice to put on my DARwIn-OP robot clone. The eMMC module comes with Android preinstall, so I’ll be installing Ubuntu and doing some tests.