Fresado CNC mejorado

Continuando con mi clon de robot DARwIn-OP, estoy cortando las piezas de los hombros.

Después de cortar la mayoría de las piezas del robot, estoy llegando a un mejor setup para cortes en mi fresadora CNC Sherline.

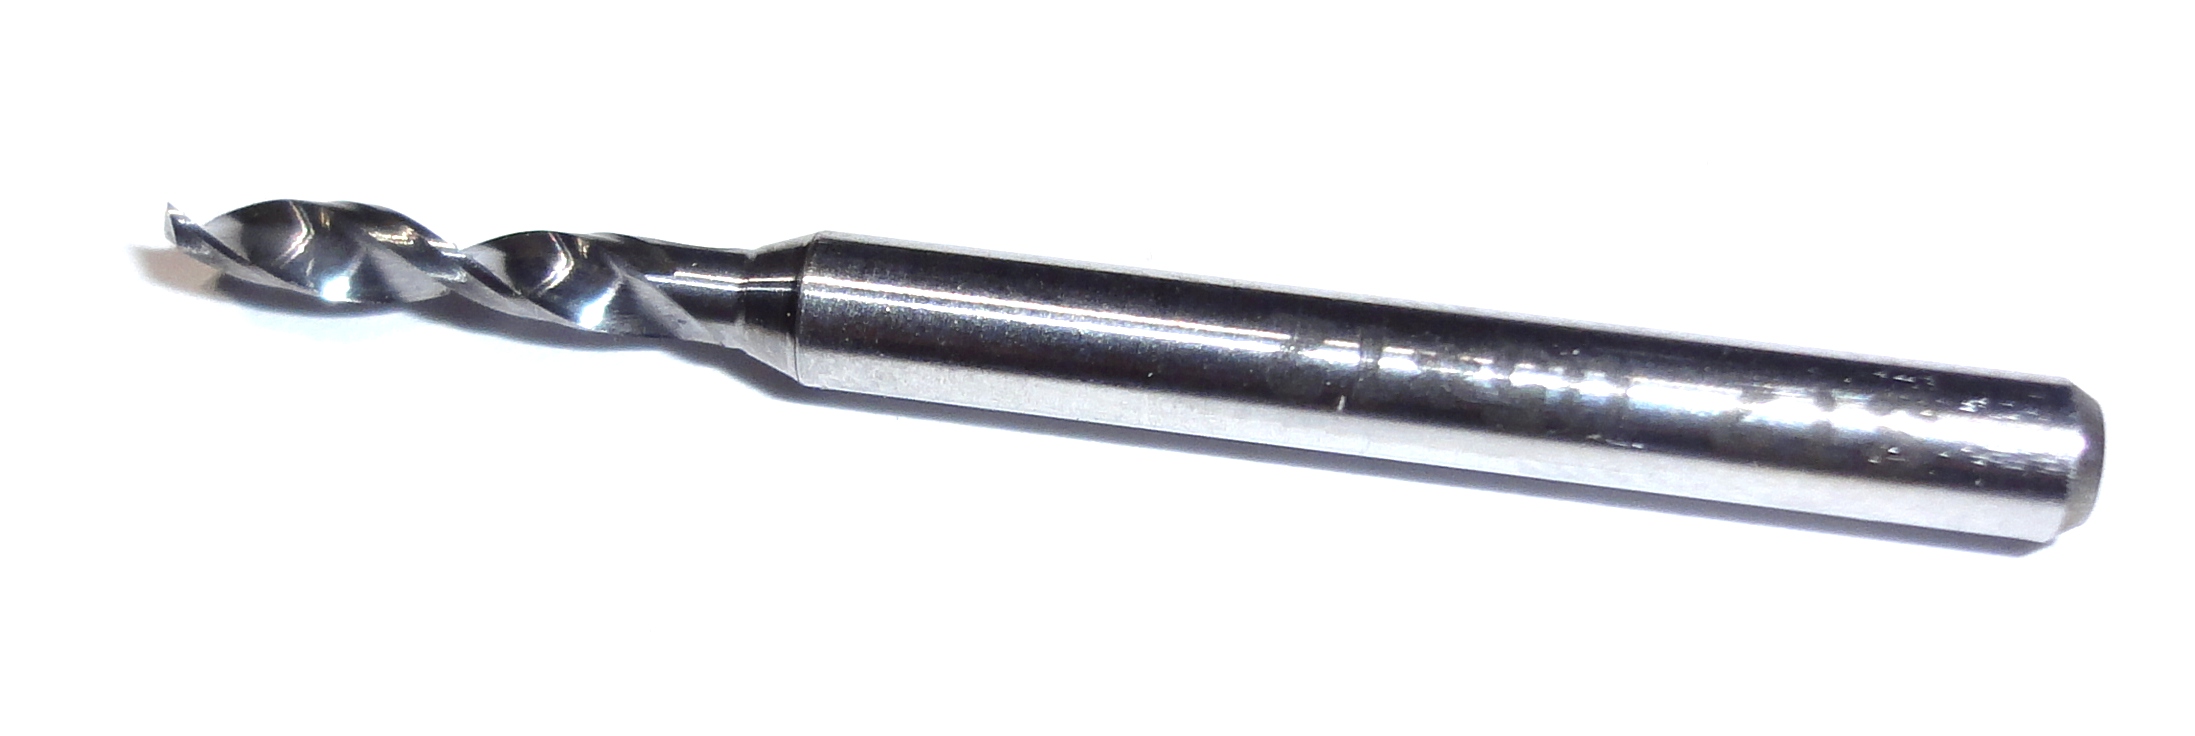
Primero empecé sujetando las planchas de aluminio sobre pequeñas placas de madera MDF, cortando con fresas de 3mm, una broca centro y varias brocas (1,6mm, 2,0mm, 2,05mm, 2,5mm y 2,6mm), después pasé a usar una fresa de 2.5mm para mejor acabado en los rebajes. Siguiendo el Manual de Fabricación de DARwIn-OP puse puntos de unión en los cortes finales de las piezas para que no se suelten. Después reemplacé el uso de una placa MDF de base por una de aluminio. Después probé fresar todo con sólo una fresa de 1.5mm, pero no me gustó el acabado y la calidad de los hoyos.

Ahora creo que tengo un mejor setup:

      • Siguiendo el setup de un amigo, reemplacé mi placa matriz de aluminio con una placa de MDF del mismo tamaño y sujeción.
      • Sujeto las planchas de aluminio con varios tornillos de 2.5mm x 10mm al rededor de la pieza a cortar. Para eso hago hoyos de 2mm x 9mm al MDF. Después de varios cortes, la placa de MDF puede ser reemplazada por otra.
      • Volví a usar una fresa de 2.5mm (o 2mm según la parte a cortar, aunque el manual de fabricación recomienda una fresa de 3mm, algunos diseños requieren cortes de radio 1mm).
      • Volví a usar brocas de 1,6mm, 2,0mm, 2,05mm, 2,5mm y 2,6mm. Pero como uso ‘fresa brocas’ de carburo, ya no estoy usando la broca centro para marcar las perforaciones. (Después de varias pruebas no noté corrimiento en los hoyos).

        Drill
        Broca
      • Ya no estoy dejando puntos de unión en los cortes finales. Ahora atornillo la pieza al MDF antes del corte final usando varios de los hoyos originales de la pieza.
      • Para espacios grandes que deban ser vaciados dentro de una pieza, freso completamente el espacio para que no se desprendan pedazos de aluminio que puedan romper la fresa. Si el espacio es muy grande, entonces también lo atornillo para fresar menos.
      • También reemplacé el cabezal de mi fresadora Sherline con un modelo ER-16 (también de Sherline). Esto permite cambios de herramientas más fáciles y hay pinzas de sujeción (o collets) disponibles como las Techniks con muy buena precisión lo que es importante para mantener fresas pequeñas bien centradas.
      • Actualicé mi fresadora a 10k RPM (con un set de Sherline).
      • Con la fresa de 2.5mm estoy cortando a 5k RPM, 200mm/s de avance y 0.4 de profundidad de corte. Con la fresa de 2mm cambio la profundidad de corte a 0.25mm.
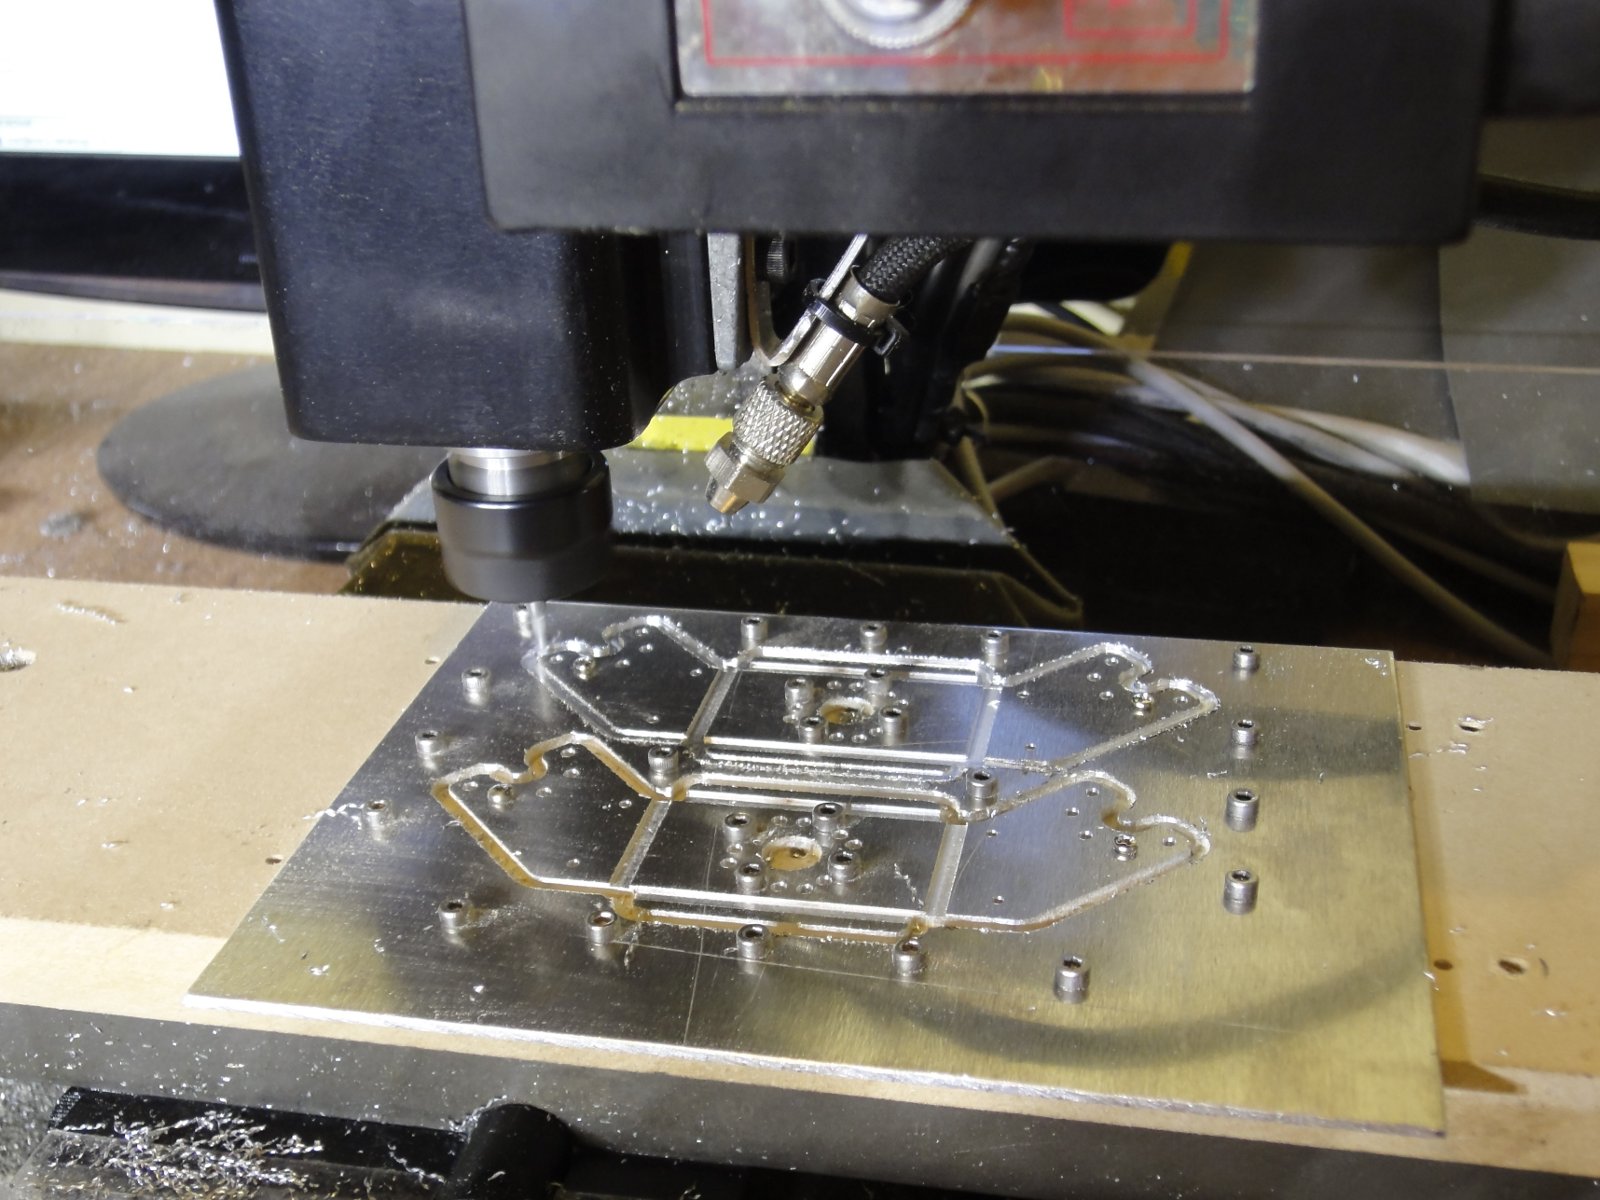
      • No uso lubricante, solamente un soplador de aire para mantener limpia el área de corte (ver foto).

La siguiente foto muestra el setup durante el último corte final:

Cutting DARwIn-OP shoulders
Cortando los hombros del robot DARwIn-OP

Los  archivos gcode más viejos que escribí no siguen estas reglas, pero no es difícil actualizarlos.

Debugged mill cuts

Continuing with my DARwIn-OP clone robot, I am now cutting the shoulder parts.

After most of the parts done, I am finally getting a better setup for cuts in my CNC Sherline mill.

First I started fixing the aluminum sheets over small MDF board, cutting with 3mm endmills, a center drill, and several drills (1.6mm, 2.0mm, 2.05mm, 2.5mm, and 2.6mm), later I moved to a smaller 2.5mm endmill for better score’s finish. Following the DARwIn-OP Fabrication Manual, I placed checks on the cutoff path so the parts would not come loose. Later I replaced the MDF base board with an aluminum plate. Then I tested only using a single 1.5mm endmill for everything, but I didn’t like the surface finish and the holes weren’t perfect enough.

Now I think I have a better setup:

  • Following a friend’s setup, I replaced my mill’s aluminum matrix plate with a MDF board with the same size and attachment.
  • I fix the aluminum plates to the MDF board with several 2.5mm x 10mm screws around the parts to be cut. For this, I drill the MDF with a 2mm drill, 9mm deep. After several cuts, the MDF can easily be changed with another one.
  • I went back to milling with a 2.5mm endmill (or 2mm endmill depending on the detail of the part, the Fabrication manual recommends a 3mm endmill, but some of the designs require 1mm radius cuts).
  • I went back to using drills of  size 1.6mm, 2.0mm, 2.05mm, 2.5mm, and 2.6mm. But since these are carbide drills with a wider (1/8″) shaft, I am not using a center drill any more to mark the holes. (After a few tests, I saw no hole displacements).

    Drill
    Drill
  • I am not leaving checks on the cutoff paths anymore. Now I screw the part to the MDF before doing a complete cutoff. I use some of the original holes of the part for this.
  • For any big slot that need to be emptied on a part, I mill it completely so no sizable aluminum bit that gets loose could break the endmill. If the slot is too big, then I would also place some screws on it so I don’t have to mill it all off.
  • Also, I replaced the Sherline mill headstock with an ER-16 model (from Sherline also). This allows for much easier tool changes, and ER-16 collets are available such as Techniks collets with very good accuracy (low TIR) which is important to keep small endmills well centered.
  • I upgraded the mill to 10k RPM (with a 10k RPM pulley set from Sherline).
  • I am cutting with the 2.5mm endmill at 5k RPM, 200mm/s speed, and 0.4mm depth of cut. For the 2mm endmill, I change the depth of cut to 0.25mm.
  • I don’t use any lubricant, only an air blower to keep the cutting area clean (see photo).

The following picture shows the setup while milling the last cutoff:

Cutting DARwIn-OP shoulders

The older gcode files I wrote don’t follow this setup, but can easily be updated.